


In this lesson, you prepare a 2D DWG file as the basis for the 3D house model.
 AutoCAD 2012.
 Application menu, choose Open. In the file dialog, browse to the \3ds max design 2012 tutorials\import\AutoCAD_files\ folder. Open wt_start.dwg.
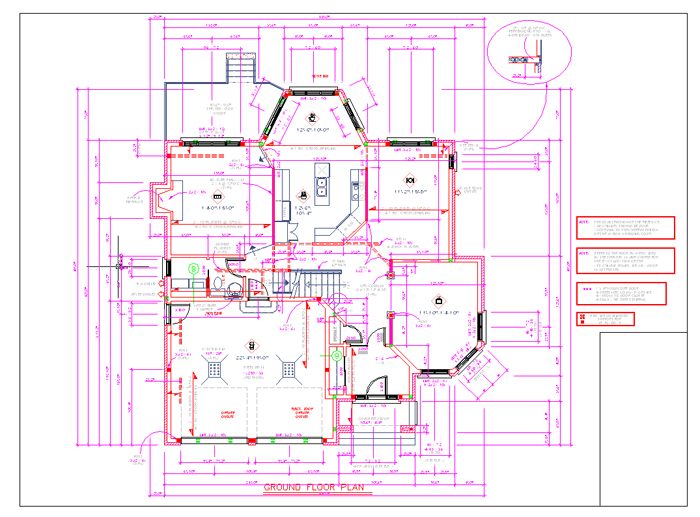
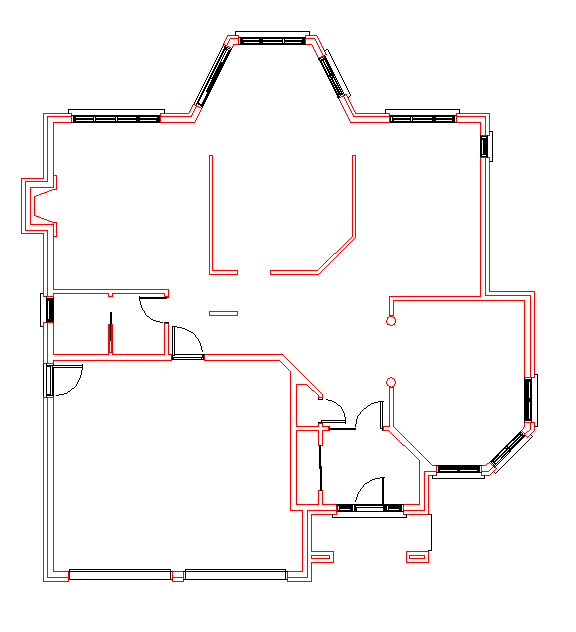
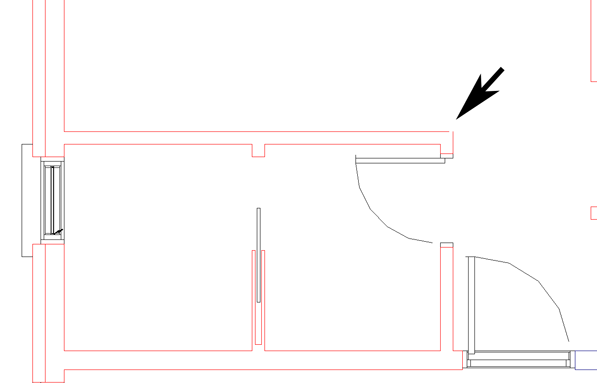
The file is the ground plan of a house.
If you are running a recent version of AutoCAD, this message appears:

Click Close to dismiss this dialog. You will save the file, but to a different file name.
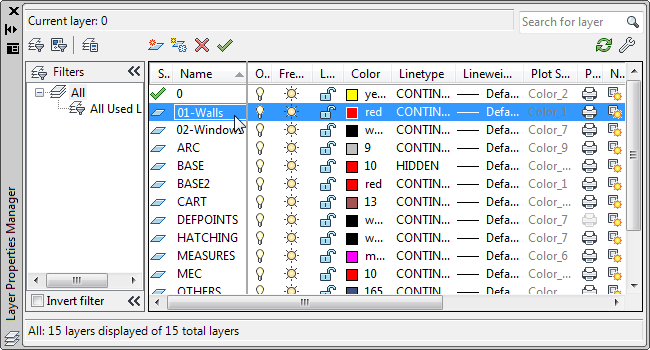
This file contains a lot of elements that aren't necessary for the 3D walkthrough. Using the Layer Manager, you can hide all the elements that you will not use. The only layers that are required for this tutorial are 01-Walls and 02-Windows.
 Home tab Layers panel, click
  (Layer Properties).
 (Set Current) to make this layer current.
Frozen to freeze all the layers. A dialog appears to inform you that the current layer cannot be frozen. Click OK.
(Set Current) to make this layer current.
Frozen to freeze all the layers. A dialog appears to inform you that the current layer cannot be frozen. Click OK. 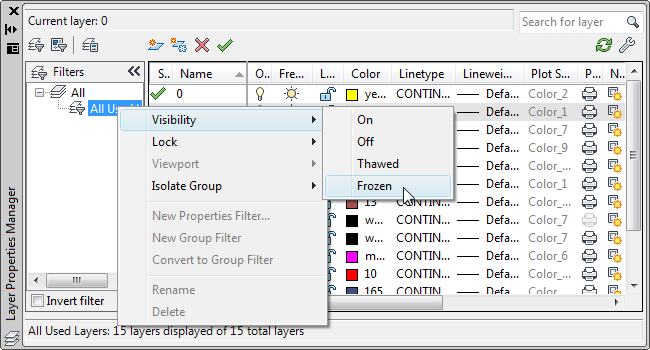
 icon to unfreeze the 02-Windows layer as well.
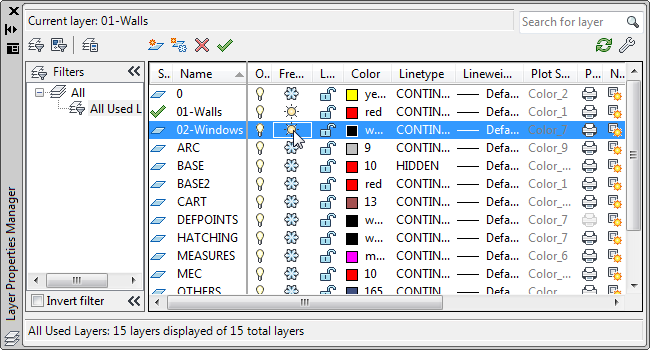
 (New Layer). Name this new layer 3DWalls. Use the square color icon in the Color column to change its color to a dark blue.
(Set Current).
(New Layer). Name this new layer 3DWalls. Use the square color icon in the Color column to change its color to a dark blue.
(Set Current).
The drawing should now show walls, windows, and doors.
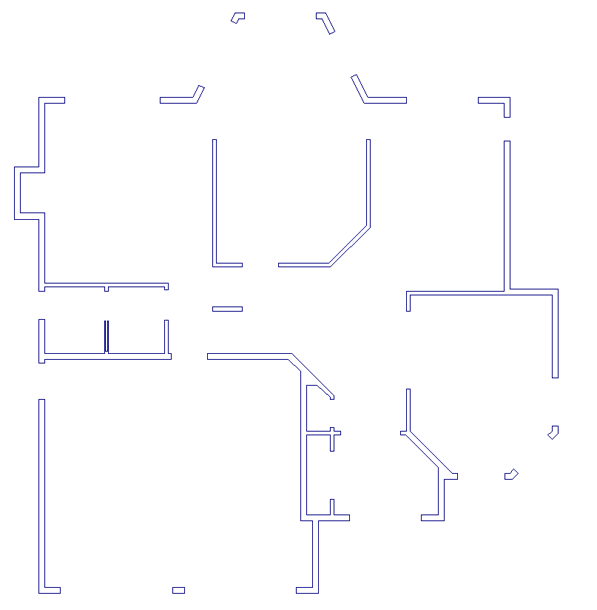
In order to create 3D walls in 3ds Max Design efficiently, you need to create Polylines using the wall lines and the Bpoly command. This command draws a closed polyline around the boundary of a selected field, leaving the original wall lines untouched. Using polylines instead of lines greatly simplifies the creation of walls later on in 3ds Max Design.
AutoCAD opens a Boundary Creation dialog.
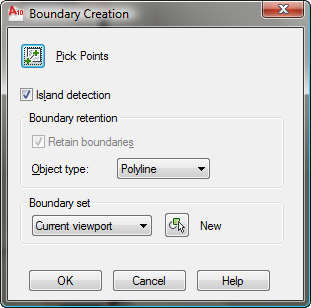
 (Pick Points).
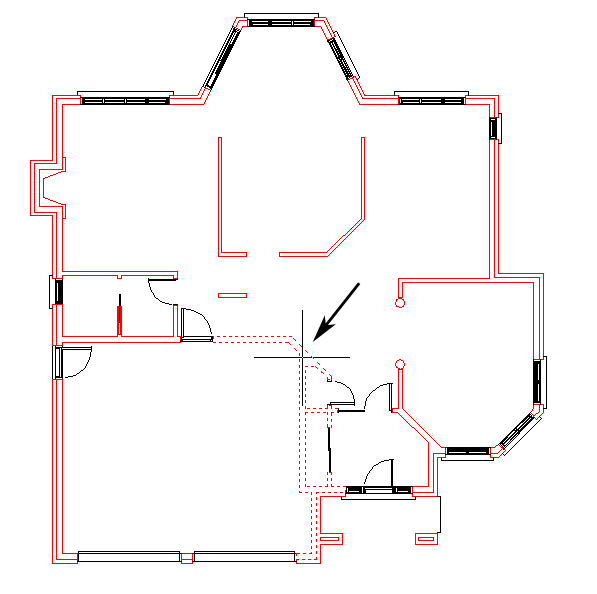
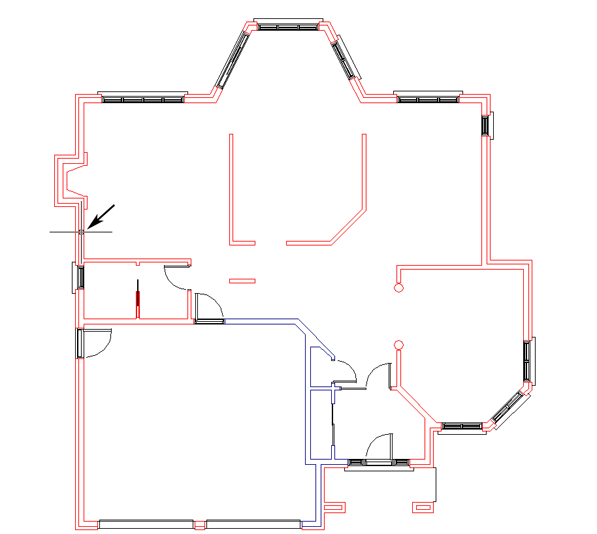
The polyline was not created because the wall is not continuous. You must close the gap before you can create a polyline.

If you see a warning that says “Valid Hatch Boundary not found,” zoom out so all the wall lines are visible in the viewport, and then use the Bpoly command again.