Each of the light types creates a new light that simulates a different real-world light source. You can add lights to your
scene using the Get  Primitive Light menu on any of the toolbars.
You can create as many lights as required for your scenes. Lights created in Softimage are saved directly in the scene file.
Choose Get Primitive Light and select a type of light (see Types of Lights for details).
You can choose More... to open a browser where you can select a light preset.
A new light, with its default settings, appears in the scene and is positioned at the origin. The property editor for the new light opens and you can adjust the values as required.
Select and manipulate lights as you would any other object. In the case of point lights and spotlights, you can use their manipulators to rotate or translate the light (press the B key). See Manipulating Lights.
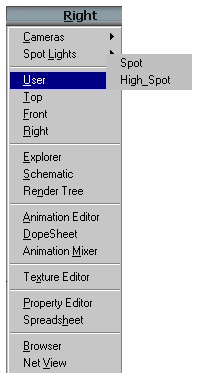
Once you've created a spotlight, you can show the scene in a 3D view from the spotlight's point of view. If you have created more than one spotlight in your scene, you can display a different spotlight view in each 3D view. A spotlight view is useful to see what objects a spotlight is lighting and from what angle.
Every spotlight that has been created in your scene is available from any of the viewport Views menus. The point of view is set according to the direction of the light cone defined for the chosen spotlight.
To look through a spotlight, choose Spot Lights from the viewport's Views menu and select from a submenu of spotlights available in the scene.
A flat light distributes light intensity uniformly in all directions and from no specific location. Using flat lighting provides a rough approximation of the general brightness of an area and replaces the complexities of calculating all the inter-object reflections in a scene. All objects in a scene are illuminated equally by the flat light regardless of their location and orientation. The only exception is when a flat light is using a spot light type. In this case, the spot light's interest must be pointing in the direction of the objects it is illuminating. However, by default, the flat light preset uses a point light source.
In general, using a flat light is a more flexible solution than setting global scene ambience because the flat light allows you to define a per-object ambience term using the light's selective property or by adding it to a material's light list (see Using Light Lists). Although you can set a local ambience property on objects and pass partitions, the flat light has the advantage of providing additional light properties such as shadows and distance attenuation that you can tweak to further define the ambient lighting effect.
If you have not done so already, delete The Default Light from the scene.
Set the scene ambience to black (or at least set it very low). For more information, see the Ambient Lighting Property Editor.
A flat light, with its default settings, is added to the scene and is positioned at the origin. The property editor for the new light opens and you can adjust the values as required.
These are the light and soft light shader properties that define a flat light:
The flat light uses a point light, but you can specify any light type in flat light mode.
The light's selective property is set to be Exclusive, thereby not illuminating the objects in its Associated Models list. By default, the Associated Models list is empty, which allows you to pick the objects that you do not want to receive the flat lighting by adding them the list. See Using Selective Lights.
Area Light is enabled and the geometry type is set to User. In flat light mode, the soft light shader requires that User be set, otherwise, back faces whose normals are pointing away, are not lit properly.
IES stands for the Illuminating Engineering Society. The IES data format is used widely by many lighting manufacturers and is one of the industry standards for photometric data distribution. An IES profile provides the measurement of the distribution of light (its intensity) stored in ASCII format.
IES profiles are created by many of the major lighting manufacturers and can be downloaded for free from their sites. Some of these sites are listed on the Softimage Wiki for your reference.
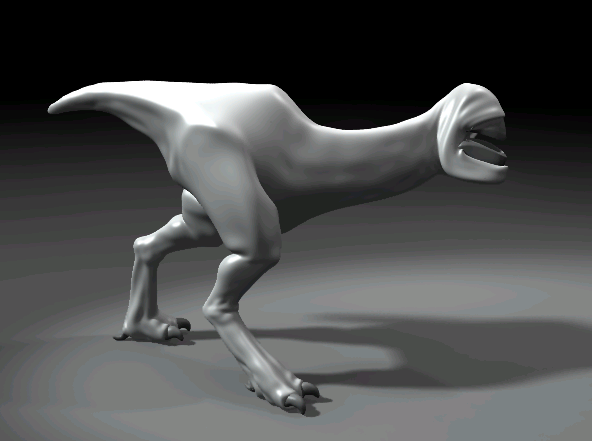
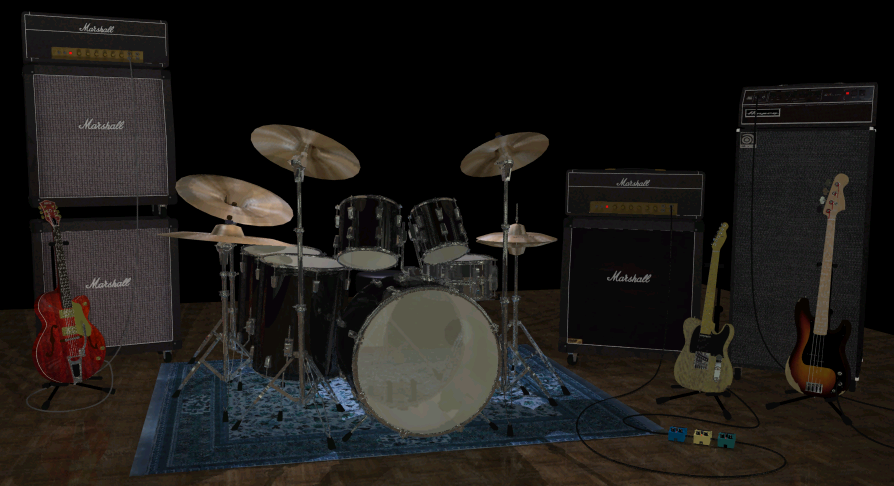
Model courtesy of Greg Punchatz rendered with IES Outdoor Roadway lighting.
You can reference an external IES profile from within the mia_photometric_light shader allowing you to create lights with shape and physically accurate intensities. In scenes with global illumination (using photons), the mia_photometric_light shader takes care of balancing the photon energy and the direct light correctly. When creating lights with IES profiles it is best to use spotlights: point lights and infinite lights do not provide adequate orientation for the IES profile to work from.
From the mental ray Light category in the preset manager, drag the mia_photometric_light shader into the render tree workspace.
Connect the output of the mia_photometric_light into the Light Shader and Light Photon Emitter Shader input ports of the Light node.

On the General tab, set the Exponent to 2 and specify a spread value for the spotlight's Cone Angle.
On the Photon tab, enable Global Illumination and set the color and Intensity of the photon energy. If your scene uses photons, you must set an energy value for the light source, it will be overriden by the energy value defined in the light shader, but without it mental ray will not emit any photons for the light at all.
On the mia_photometric_light tab, set both the Intensity Mode and the Distribution Mode to IES Profile.
In the Light Profile selector, browse for and select an IES profile stored anywhere on your system. The Light Profile selector also displays a 2D representation of the light intensity distribution with some textual information on the profile itself.
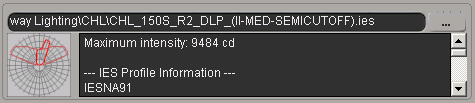
You may need to modify the Units to Meter Scale parameter to either dim or brighten the light depending on your scene scale.
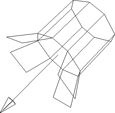
Any point or spotlight can be turned into an area light by specifying an area light geometry to determine the shape of the surface from which the light rays emanate. Area lights generate soft shadows because shadow-casting objects may partially obscure the light source, thereby creating a more natural blended shadow (see Creating Soft Shadows with Area Lights for details).
Choose Get Primitive Light Point or Spot from any of the toolbars.
Select the point or spotlight and press Enter on the keyboard to display the selected light's property editor.
Select a Geometry for the area light to use. This is an important option because it determines the shape of the surface from which the light rays emanate. See Light Property Editor for detailed parameter descriptions.
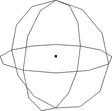
Rectangle, Disc, Sphere, and Cylinder primitives can be used with both point and spotlights. The orientation of a given primitive is independent of the light direction and any directional attenuation the light shader may apply, although both should generally be similar.
Geometric area lights (also known as Object lights) can only be created for point lights. Object lights behave exactly as do the pre-defined area light primitives (rectangle, disc, sphere, and cylinder) except that the light's shape is defined based on an object in your scene. All points on its surface emit light uniformly.
User-defined area lights are intended for use with a custom light shader that controls all of the light sampling.
Set the Sampling options to control the size of the grid of sample points on the surface of the area light in the U and V directions. Values greater than 5 take longer to render. See Samples and Low Samples for detailed parameter descriptions.
If necessary, adjust the size and orientation of the area light's geometry as described in Transforming Area Lights.
 Except where otherwise noted, this work is licensed under a Creative Commons Attribution-NonCommercial-ShareAlike 3.0 Unported License