You can organize 3D objects, cameras, and lights into groups for the purpose of selection, applying operations, assigning properties and shaders, and attaching materials and textures. Creating groups means that you don't need to reselect the same set of objects each time you want to work with them. Groups are sometimes called " named selections".
Besides being able to organize objects into groups, you can also create a group of groups. An object can be a member of more than one group. Groups, however, can't be added in hierarchies. They can only live immediately beneath the scene root or a model.
Even if an object is in a group, it can still be individually selected and manipulated.
For information on duplicating groups, see Duplicating and Cloning Objects.
In Softimage, groups are tool for organizing and sharing properties. If you are coming from another software package and want to control transformations, for example, in a character rig, see Transform Groups (Parenting with Null Objects) [Animation].
Groups cannot contain components such as polygons and points. Named selections of components are called clusters in Softimage. See Components and Clusters.
Any parameter values or operations applied to a group of objects are shared by each member of the group. Parameter values are stored at a group level and override any existing values previously assigned to any members within the group. Original values are kept for each object or component in a group.
Select one or more objects you want in the group; you can also select multiple groups.
In the Group property editor, enter a name for your group and select the different View Visibility, Render Visibility, Selectability, View Playback Visibility, and Animation Ghosting options.
All selected objects are grouped together. In the explorer, you can see the group with all its members within it.

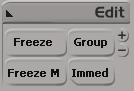
You can select groups in the 3D and schematic views using the Group selection button or the = key. Note that the Group button changes to the Cluster button when a component filter is active.
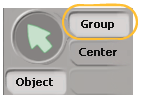
As an alternative, you can also use the Explore button on the Select panel to list all groups in the scene.
Once a group is selected, you can select it members.
Use the mouse to select any member of the group in the 3D or schematic views.
If an object is a member of multiple groups, all groups are selected. You can use the Selection button to refine the selection further (see Refining the Selection with the Selection Explorer).
If an object is not a member of any group, the object itself is selected.
If a hierarchy is a member of a group then you must select the root of the hierarchy rather than a descendant, even if the hierarchy was added to the group as a branch or tree.
To explore all groups in the scene
Choose Explore  Groups from the Select panel. A pop-up explorer opens showing all groups in the scene.
You can use this pop-up explorer to select one or more groups just as in an explorer window. See Selecting Elements in the Explorer [Interface and Tools].
Adding and Removing Elements from Groups
You can add items to or remove individual items from groups.
Add the desired objects to the selection.
In the case of groups of groups, everything will be added to the first group you selected in step 1.
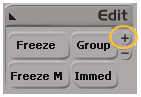
In the Edit panel, click the + button (next to the Group button).
In the explorer, right-click on the group and choose Add to Group.
Drag the objects and drop them onto the group node in an explorer. With this method, you do not need to select the group first.
To remove objects from a group
If the objects to be removed are members of more than one group, first select the group that contains them.
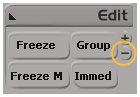
In the Edit panel, click the – button (next to the Group button).
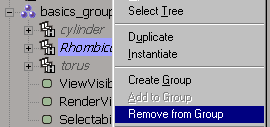
Go to node of the desired group in the explorer, right-click the icon of the object to be removed, and choose Remove from Group. With this method, you do not need to select the group first (in the case of multiple groups).
When you delete groups, only the relationship between the objects is deleted, not the objects themselves.
When you delete an element that contains other groups, the "parent" group is removed and the "child" groups are preserved.