Export a storyboard to an Adobe® Flash® movie for an easy and effective way to tell your story, in a portable format. The movie you create contains thumbnail images of the slides you include. Viewers of the movie just have to click on a thumbnail to see its related slide. You can lay out the thumbnails horizontally or vertically, and split them into two groups if you like.
You must have at least one slide in a storyboard to create a movie.
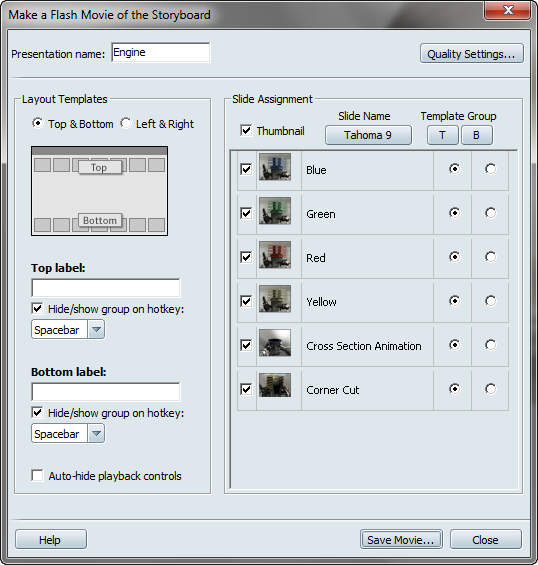
Change the layout of the Flash movie
By default, a Flash movie looks similar to the following, with slide thumbnails placed horizontally in one line across the top of the screen.

You can change this in the Make a Flash Movie of the Storyboard dialog box as described in the following procedures.
To display thumbnails horizontally or vertically across the movie:
To separate slides into groups:
For example, in a Top & Bottom layout, select the radio buttons in the T (Top) and B (Bottom) columns. In a Left & Right layout, select the radio buttons in the L (Left) and R (Right) columns.
To place all slides into one group:
For example, in a Top & Bottom layout, click the B column header to assign all slides to the bottom group.
To assign names to the groups:
The names can describe the organization of your slides. For example if you have three slides that show material alternatives, and three that show different environments, you could name the top group “Materials” and the bottom group “Environments.”
To exclude slides from the movie:
Customize navigation controls in a movie
You can specify whether or not you want to be able to hide navigation controls in the Flash movie. Do this in the Make a Flash Movie of the Storyboard dialog box as described in the following procedures.
To assign a hotkey that shows or hides a slide group in a movie:
When you watch the movie, you will be able to toggle visibility of the slide group using the hotkey you selected.
You can set the playback controls to hide or show based on the proximity of the mouse to the lower part of the playback window. Do this as follows:
This section describes how to adjust output settings and create your movie from the Make a Flash Movie of the Storyboard dialog box.
The controls available to you are also used when creating movies from shots, with the following exceptions:
See Create a movie of one or all shots for more information.
The movie is saved as a Flash (SWF) file in the location you specified, along with an accompanying HTML file. A sub-folder is created with the name mymovie-presentation. This folder contains movie frame JPG files and a folder that contains the thumbnail images. The folder, the SWF file, and the HTML file must be in the same folder for the presentation to work.
To open the movie, double-click the HTML file. If you have never opened an SWF file in your browser, you may be prompted to install the Flash plug-in.
To play a slide, click its thumbnail or click the Play button on the bottom left of the screen.
Click the loop icon in the bottom right corner of the page to switch between the following settings:
To ‘scrub’ through the movie, drag the slider at the bottom of the screen to the left or right.