You can modify an existing stencil by deforming it with Sculpt tools like Grab and Pinch, deforming the stencil to more closely conform to the shape of your model, then rub or project the stencil detail onto the model. You can also use the full Paint Tools set to touch up existing stencil images or paint new stencils, including tileable stencils.
You can edit stencils for temporary use, or save them to the Stencil tray to use again later.
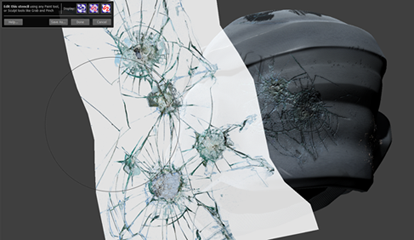
The semi-transparent Edit this stencil window displays at the top left of the Mudbox interface.
If the stencil you selected was set with Tiling (created with Tiling turned on in the Create New Stencil window), the stencil displays as a grid of 9 copies. This lets you view how the stencil tile edges meet so you can ensure any pattern you paint will tile correctly.
As long as the stencil editing window displays, Mudbox is in stencil editing mode, and any tool you select is applied to the stencil. If you apply a Paint tool, a paint layer called Edited Stencil is automatically created in the Paint Layers window.
You can use all Paint tools except Clone for stencil editing. All Sculpt tools work, although Pinch and Grab give the most tangible results.
Note that this does not save the stencil, so if you select another stencil, the current stencil is lost. You can, however, select Edit > Stencil again (or press R) to continue editing the stencil.
This opens the Save Stencil As window, letting you save the stencil to disk and specify whether you want it added to your Stencil tray.
 Except where otherwise noted, this work is licensed under a Creative Commons Attribution-NonCommercial-ShareAlike 3.0 Unported License


