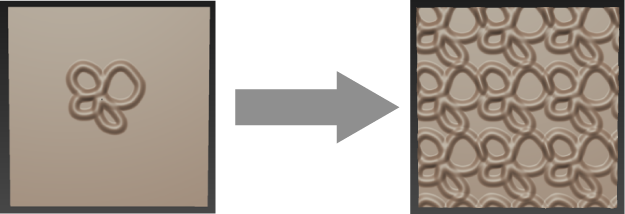
Tiling planes let you quickly sculpt or paint a mesh with a seamless, repeating pattern. You can use tiling planes to efficiently cover large surface areas, or easily extract a texture map of the repeated sculpt detail. Once you've created a tiled texture map, use it as a paint layer or a stencil for painting and sculpting, and delete the tiling plane when you no longer need it.
By default, the tiling plane is oriented toward the plane defined by the X and Z axes. Until you sculpt or paint on it, the tiling plane appears identical to the normal plane template available from the Create > Mesh menu.
Just like any other mesh, you can press Shift + D to subdivide the tiling plane and get more detail for sculpting.
Depending on the options you specify, Mudbox also creates a second plane in the Object List called Extraction Target. This plane is locked by default, and is intended to be used as the target model if you later choose to extract the details from your tiling plane as a texture map.