This topic serves as an introduction to using Python with MotionBuilder. Several important classes and concepts are presented here to give you a basic understanding of how to use Python with MotionBuilder.
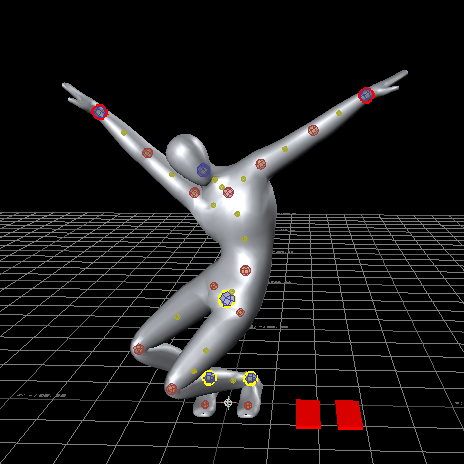
The Dancing Man program described in this topic constrains a character's hip effector to the mouse's (x,y) screen coordinates. At the end of this step-by-step tutorial, a character will appear to dance in the scene as the user moves the mouse. The image below shows the end result of The Dancing Man program.
"Those who danced were thought to be quite insane by those who could not hear the music." - Angela Monet
From the MotionBuilder application menu, select Window > Python Editor. This opens the Python Editor window, in which you can create and run Python Programs.
Importing the MotionBuilder Python Module
The MotionBuilder Python API is contained in the pyfbsdk module. This Python module is generated from the MotionBuilder C++ API using Boost Python. The pyfbsdk module contains the vast majority of the Python classes included in the MotionBuilder SDK, as well as many useful functions, including matrix and vector manipulation functions (FBMatrixInverse(), FBDot(), FBLength(), etc). For more information, consult Python Reference > Modules > pyfbsdk in the left navigation tree.
The following code sample imports the pyfbsdk module, which should be the first line of your MotionBuilder Python program. We also import the os module, which we will use later to interface with the operating system.
from pyfbsdk import *
import os
We first obtain a reference to MotionBuilder's instance of FBApplication. This class provides much of the functionality present in the File application menu. In the following code sample, we invoke FBApplication.FileNew(), which is equivalent to File > New, but does not prompt the user to save before clearing the scene. For more information, see FBApplication - File I/O and Application Utilities.
# Get the instance of FBApplication, and clear the scene with FileNew().
app = FBApplication()
app.FileNew()
We then obtain a reference to MotionBuilder's scene, which will be used later to add a mouse device. The FBSystem class is used to access the scene (FBScene), as well as track various system properties including memory usage, the application path, and MotionBuilder's version information. For more information, see FBSystem - The System Class.
# Get a reference to the underlying system properties of MotionBuilder.
system = FBSystem()

# Get a reference to the current MotionBuilder scene.
scene = system.Scene
The character file we want to open is in the MotionBuilder installation directory, under OpenRealitySDK\scenes\PlasticMan.fbx. We define the helper function GetMotionBuilderInstallationDirectory() to obtain MotionBuilder's installation directory, which makes use of the FBSystem.ApplicationPath property.
# Get the MotionBuilder installation directory.
#
# Note: FBSystem().ApplicationPath returns a string similar to:
#       'C:\Program Files\Autodesk\MotionBuilder 2012 (64-bit)\bin\x64'.
#       We only want to return the substring:
#       'C:\Program Files\Autodesk\MotionBuilder 2012 (64-bit)\
#
def GetMotionBuilderInstallationDirectory() :
    applicationPath = FBSystem().ApplicationPath
    return applicationPath[0:applicationPath.index('bin')]
Invoking FBApplication.FileOpen() with the second argument set to False will open the "PlasticMan.fbx" file without prompting the user with a dialogue box. For more information on opening, merging or appending the contents of a file to the scene, see Loading from a File. Upon completion of FBapplication.FileOpen(), the PlasticMan character will appear in the MotionBuilder application.
# Use the sample PlasticMan.fbx file in the default installation directory.
filename = GetMotionBuilderInstallationDirectory() + 'OpenRealitySDK\scenes\PlasticMan.fbx'
app.FileOpen(filename, False)
Getting the Character's Hips Effector
To make the PlasticMan character dance, we will need to manipulate his hips effector. Most objects in the scene can be uniquely identified according to their own namespace and name (see Names and Namespaces). As such, we will obtain the hips effector by searching for the FBModel whose name corresponds to "Plasticman_Ctrl:HipsEffector" via FBFindModelByLabelName().
# Get a reference to the Plastic Man's hips effector.
hipEffector = FBFindModelByLabelName("Plasticman_Ctrl:HipsEffector")
The hipEffector variable now points to the FBModelMarker corresponding to the PlasticMan's hips effector. The FBModel base class is used to define the Translation, Rotation and Scaling (TRS) of scene elements. As we will see shortly, our goal here is to constrain the translation and rotation of the PlasticMan's hips effector to the mouse's input.
Adding a Mouse Device to the Scene
To use the mouse as an input device, we will need to add a mouse FBDevice to the scene. The FBCreateObject() function can be used to obtain a mouse device. Once the mouse object is created, we must activate it (FBDevice.OnLine), allow the application to read its data (FBBox.Live) , and append it to the scene's list of devices (FBScene.Devices).
# Create a mouse device and append it to the scene.
mouseDevice = FBCreateObject("Browsing/Templates/Devices", "Mouse", "MyMouse")
mouseDevice.OnLine = True
mouseDevice.Live = True
scene.Devices.append(mouseDevice)
The FBCreateObject() function is used to create objects from within the Asset Browser UI window. We describe its arguments below.

Constraining the Character's Hips Effector to the Mouse
We can now constrain the character's hips effector to the mouse's input. To do this, we create a new FBConstraintRelation, and name it "DanceConstraint".
# Create a constraint relation.
constraintRelation = FBConstraintRelation("DanceConstraint")
constraintRelation.Active = True
The following image illustrates how the hips effector will be constrained by the mouse device's output. Instances of FBBox and FBAnimationNode are used in an FBConstraintRelation to define the behavior of the constraint.

Animatable Elements - The FBBox Base Class
FBBox is the base class of any animatable element in the scene, including models (FBModel), lights (FBLight), materials (FBMaterial), textures (FBTexture), shaders (FBShader), constraints (FBConstraint), and so on. Our FBConstraintRelation will contain a set of FBBox objects. In the image above, the boxes "MyMouse", "Number to Vector", "Number to Vector 1", and "Plasticman_Ctrl:HipsEffector" are all instances of FBBox. Each instance of FBBox can fulfill a specific role in the FBConstraintRelation:
In the following code sample, we create these boxes and set their position in the "Constraint Settings" UI window accordingly.
# 1. Create a box for the mouse's output.
mouseBox = constraintRelation.SetAsSource(mouseDevice)
constraintRelation.SetBoxPosition(mouseBox, 30, 30)

# 2. Create a box for the hip effector's input.
hipEffectorBox = constraintRelation.ConstrainObject(hipEffector)
constraintRelation.SetBoxPosition(hipEffectorBox, 700, 30)

# 3. Create a number to vector box to map the 'Y' output of the mouse
# to the 'Y' translation of the PlasticMan's hip effector.
translationConversionBox = constraintRelation.CreateFunctionBox('Converters', 'Number to Vector')
constraintRelation.SetBoxPosition(translationConversionBox, 300, 100)

# 4. Create a number to vector box to map the 'X' output of the mouse
# to the 'X' and 'Z' rotation of the PlasticMan's hip effector.
rotationConversionBox = constraintRelation.CreateFunctionBox('Converters', 'Number to Vector')
constraintRelation.SetBoxPosition(rotationConversionBox, 300, 0)
Animatable Properties - The FBAnimationNode Class
Instances of FBAnimationNode are contained within an FBBox. In the image above, the animation nodes are denoted by arrows. An FBAnimationNode exists for any animatable property of an FBBox. For example, the "Plasticman_Ctrl:HipsEffector" box provides one "input" animation node for each of its animatable properties: translation, rotation, and scaling.
The utility function FindAnimationNode() defined at the beginning of our program returns the child animation node whose name corresponds to the one specified by pName.
# Define a utility function to look up a named
# animation node under a given parent node.
def FindAnimationNode( pParent, pName ):
    lResult = None
    for lNode in pParent.Nodes:
        if lNode.Name == pName:
            lResult = lNode
            break
    return lResult
In the following code sample, we extract the animation nodes of interest, and connect them together via FBConnect().
# Get a reference to all the animation nodes we need to connect.
# Mouse output:
xMouseOut = FindAnimationNode(mouseBox.AnimationNodeOutGet(), 'X')
yMouseOut = FindAnimationNode(mouseBox.AnimationNodeOutGet(), 'Y')

# Translation conversion:
yTranslationConversionIn = FindAnimationNode(translationConversionBox.AnimationNodeInGet(), 'Y')
translationConversionOut = FindAnimationNode(translationConversionBox.AnimationNodeOutGet(), 'Result')

# Rotation conversion:
xRotationConversionIn = FindAnimationNode(rotationConversionBox.AnimationNodeInGet(), 'X')
zRotationConversionIn = FindAnimationNode(rotationConversionBox.AnimationNodeInGet(), 'Z')
rotationConversionOut = FindAnimationNode(rotationConversionBox.AnimationNodeOutGet(), 'Result')

# Hip effector input. Can be obtained in the following alternative ways:
# hipTranslationIn = FindAnimationNode(hipEffectorBox.AnimationNodeInGet(), 'Translation')
# hipRotationIn = FindAnimationNode(hipEffectorBox.AnimationNodeInGet(), 'Rotation')
hipTranslationIn = hipEffector.Translation.GetAnimationNode()
hipRotationIn = hipEffector.Rotation.GetAnimationNode()


# Connect the animation nodes in the constraint.
FBConnect(yMouseOut, yTranslationConversionIn)
FBConnect(xMouseOut, xRotationConversionIn)
FBConnect(xMouseOut, zRotationConversionIn)
FBConnect(translationConversionOut, hipTranslationIn)
FBConnect(rotationConversionOut, hipRotationIn)
Saving to a File with a Dialog
We finally ask the user where to save the scene. To do this, we create a dialog box using FBFilePopup(), and configure it for saving.
# Save the file using a dialog box.
saveDialog = FBFilePopup()
saveDialog.Style = FBFilePopupStyle.kFBFilePopupSave
saveDialog.Filter = '*'

saveDialog.Caption = 'My Save Dialog Box'
# Set the path to the current user's My Documents\MB folder.
saveDialog.Path = os.path.expanduser('~') + '\Documents\MB'
saveDialog.FileName = 'DancingMan.fbx'

if saveDialog.Execute():
app.FileSave(saveDialog.FullFilename)The following code sample is the complete Dancing Man program which you can copy into the Python Editor and run. Change the filename value to a suitable path if you are not using the default 64-bit installation of MotionBuilder. You will also have to change the string "Plasticman_Ctrl:HipsEffector" if your file contains a different character.
from pyfbsdk import *
import os

# Define a utility function to look up a named
# animation node under a given parent node.
def FindAnimationNode( pParent, pName ):
    lResult = None
    for lNode in pParent.Nodes:
        if lNode.Name == pName:
            lResult = lNode
            break
    return lResult

# Get the MotionBuilder installation directory.
#
# Note: FBSystem().ApplicationPath returns a string similar to:
#       'C:\Program Files\Autodesk\MotionBuilder 2012 (64-bit)\bin\x64'.
#       We only want to return the path:
#       'C:\Program Files\Autodesk\MotionBuilder 2012 (64-bit)\
def GetMotionBuilderInstallationDirectory() :
    applicationPath = FBSystem().ApplicationPath
    return applicationPath[0:applicationPath.index('bin')]


# Get the instance of FBApplication, and clear the scene with FileNew().
app = FBApplication()
app.FileNew()


# Get a reference to the underlying system properties of MotionBuilder.
system = FBSystem()


# Get a reference to the current MotionBuilder scene.
scene = system.Scene


# Use the sample PlasticMan.fbx file in the default installation directory.
filename = GetMotionBuilderInstallationDirectory() + 'OpenRealitySDK\scenes\PlasticMan.fbx'
app.FileOpen(filename, False)


# Get a reference to the Plastic Man's hips effector.
hipEffector = FBFindModelByLabelName('Plasticman_Ctrl:HipsEffector')


# Create a mouse device and append it to the scene.
mouseDevice = FBCreateObject('Browsing/Templates/Devices', 'Mouse', 'MyMouse')
mouseDevice.Online = True
mouseDevice.Live = True
scene.Devices.append(mouseDevice)


# Create a constraint relation.
constraintRelation = FBConstraintRelation('DanceConstraint')
constraintRelation.Active = True


# 1. Create a box for the mouse's output.
mouseBox = constraintRelation.SetAsSource(mouseDevice)
constraintRelation.SetBoxPosition(mouseBox, 30, 30)

# 2. Create a box for the hip effector's input.
hipEffectorBox = constraintRelation.ConstrainObject(hipEffector)
constraintRelation.SetBoxPosition(hipEffectorBox, 700, 30)

# 3. Create a number to vector box to map the 'Y' output of the mouse
# to the 'Y' translation of the PlasticMan's hip effector.
translationConversionBox = constraintRelation.CreateFunctionBox('Converters', 'Number to Vector')
constraintRelation.SetBoxPosition(translationConversionBox, 300, 100)

# 4. Create a number to vector box to map the 'X' output of the mouse
# to the 'X' and 'Z' rotation of the PlasticMan's hip effector.
rotationConversionBox = constraintRelation.CreateFunctionBox('Converters', 'Number to Vector')
constraintRelation.SetBoxPosition(rotationConversionBox, 300, 0)


# Get a reference to all the animation nodes we need to connect.
# Mouse output:
xMouseOut = FindAnimationNode(mouseBox.AnimationNodeOutGet(), 'X')
yMouseOut = FindAnimationNode(mouseBox.AnimationNodeOutGet(), 'Y')

# Translation conversion:
yTranslationConversionIn = FindAnimationNode(translationConversionBox.AnimationNodeInGet(), 'Y')
translationConversionOut = FindAnimationNode(translationConversionBox.AnimationNodeOutGet(), 'Result')

# Rotation conversion:
xRotationConversionIn = FindAnimationNode(rotationConversionBox.AnimationNodeInGet(), 'X')
zRotationConversionIn = FindAnimationNode(rotationConversionBox.AnimationNodeInGet(), 'Z')
rotationConversionOut = FindAnimationNode(rotationConversionBox.AnimationNodeOutGet(), 'Result')

# Hip effector input. Can be obtained in the following alternative ways:
# hipTranslationIn = FindAnimationNode(hipEffectorBox.AnimationNodeInGet(), 'Translation')
# hipRotationIn = FindAnimationNode(hipEffectorBox.AnimationNodeInGet(), 'Rotation')
hipTranslationIn = hipEffector.Translation.GetAnimationNode()
hipRotationIn = hipEffector.Rotation.GetAnimationNode()


# Connect the animation nodes in the constraint.
FBConnect(yMouseOut, yTranslationConversionIn)
FBConnect(xMouseOut, xRotationConversionIn)
FBConnect(xMouseOut, zRotationConversionIn)
FBConnect(translationConversionOut, hipTranslationIn)
FBConnect(rotationConversionOut, hipRotationIn)


# Save the file using a dialog box.
saveDialog = FBFilePopup()
saveDialog.Style = FBFilePopupStyle.kFBFilePopupSave
saveDialog.Filter = '*'

saveDialog.Caption = 'My Save Dialog Box'
# Set the path to the current user's My Documents\MB folder.
saveDialog.Path = os.path.expanduser('~') + '\Documents\MB'
saveDialog.FileName = 'DancingMan.fbx'

if saveDialog.Execute():
    app.FileSave(saveDialog.FullFilename)


