Modify character animation with keyframes and export it to 3ds Max


In MotionBuilder, you can animate characters by setting keyframes manually. This is useful for creating original animation or making changes to motion capture animation.

In the following procedure, you use key frame animation to refine motion capture animation and then export your edited animation and the character back to 3ds Max.

If you already know how to keyframe characters in MotionBuilder, you can skip to step 21 and export your character to 3ds Max.

NoteThis tutorial uses the MotionBuilder and 3ds Max single-step interoperability workflows, using the Send to 3ds Max menu option. If you do not have the 2012 or 2013 versions of these products, refer to the MotionBuilder Help.

To fine-tune Motion Capture animation with keyframing:

  1. In MotionBuilder, open your result My_Pepe_Mocap.FBX file from the previous procedure (Animate a character using motion capture data) to apply the motion capture data to Pepe.
    NoteIf you did not complete the previous procedure, open the Pepe_Mocap.FBX file.
    NoteRemember to navigate to save the file to a directory other than the default MotionBuilderTutorials directory, so that you do not override the original .fbx file.

    Press Ctrl-A until only Pepe is visible.

  2. On the Character Representation of the Character Controls, click the Right Wrist effector.

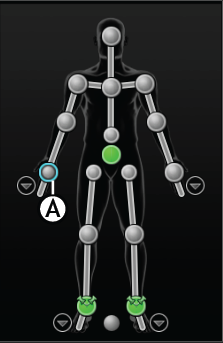
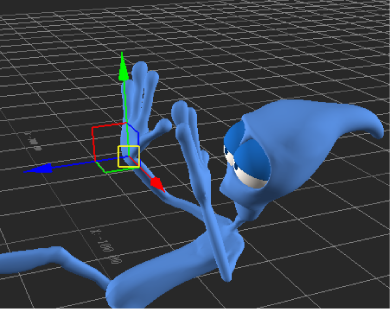
    Right Wrist effector selected

  3. Click in the Viewer window and press T.

    The transformation handles do not display.

  4. Try to move Pepe’s hand.

    Nothing happens because Pepe’s animation is controlled by the skeleton, not the Control rig. Before you can keyframe Pepe’s motion capture animation, you must plot (or bake) the skeleton animation onto the Pepe character Control rig.

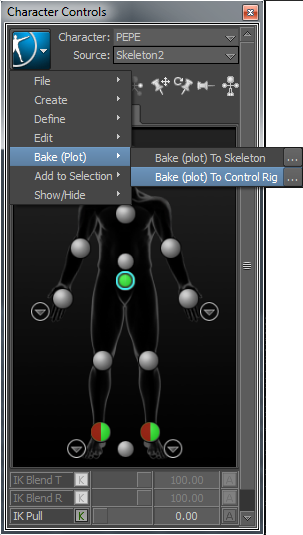
  5. From the Character Controls menu button, select Bake (Plot) > Bake (plot) To Control Rig.

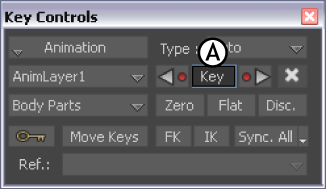
    The Bake (plot) to Control Rig command creates a key at every frame at the base layer (or BaseAnimation layer) of the animation track, making edits difficult. (You can see these keyframes in the Transport controls if you select Pepe’s wrist effector.)

    You can now edit the Pepe character using Pepe’s Control rig.

  6. In the Key Controls, click the Layer menu and select AnimLayer1.

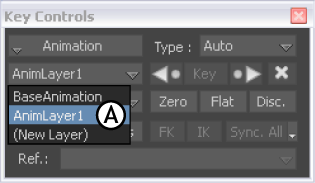
    AnimLayer1 selected for adding keyframes

    Selecting another layer lets you edit the animation while preserving the original animation on the BaseAnimation layer. When you select AnimaLayer1, the timeline hides the keyframes on the BaseAnimation layer and shows the keyframes set on AnimLayer1 (there are none at the moment).

  7. Go to frame 80, which is the start of the problematic right hand movement. On the Character Controls window Character Representation, click the Right Wrist effector, then in the Key Controls, click Key.
    NoteYou can also set a key by pressing K.
  8. Go to frame 105, the end of the problem hand movement, and set another key.

    As you take the following steps, all character movement before the first key and after the second key will remain unchanged. Only the character movement between frames 80 to 105 will be modified.

  9. Go to frame 94, the mid point between the two keyframes you set.
  10. In the Viewer window, press T, move the hand away from Pepe’s face on its X and Z axes as shown in the following figure, then set another key.

    Hand moved away from Pepe’s face

  11. Press J, then drag back and forth to see how the hand reacts to the keys you just created.
  12. Make any further adjustments to the hand movement as required. Make sure to create a key after each adjustment.
  13. Advance to the last frame of the animation and adjust your view until you can see the right side of Pepe’s body.

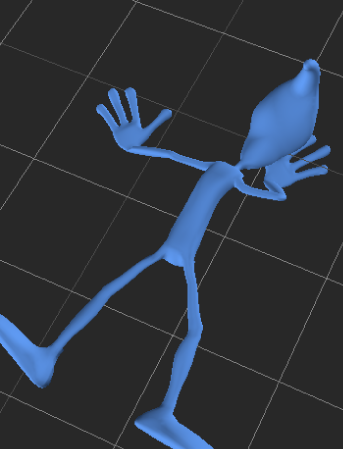
    Right hand is too close to the character’s head

  14. Move Pepe’s hand away from his body and set a key.
  15. Press R to use the key rotation rings to modify the hand’s position until it rests flat on the ground, then set another key.
    NoteYou may need to change your view so you can see if Pepe’s hand is flat on the ground.

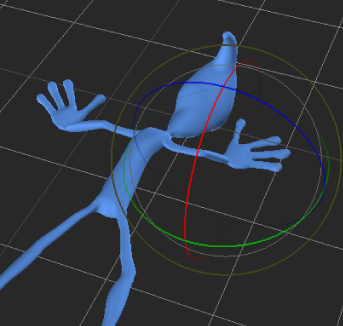
    Rotation rings used to reposition right hand

  16. Play back the animation to see the result.
  17. Make any further adjustments to the character body position and save your file as My_Pepe_keyanim.FBX.
    NoteWhen you save your file, the animated Pepe character in your scene is saved, but so is the yellow reference skeleton. If you want, you can delete the skeleton from the scene, or select the Pepe character and save it to another file for import to 3ds Max.
  18. Drag across the Pepe character to select him. This way you can exclude the yellow skeleton when you export him to 3ds Max.
  19. From the MotionBuilder main menu, select File > Send To 3ds Max > Send as New Scene.

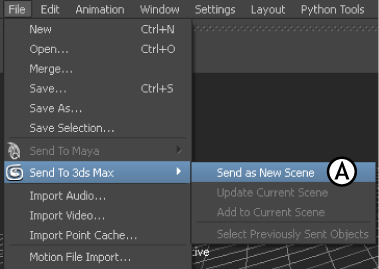
    File >Send to 3ds Max > Send as New Scene

    3ds Max launches and the animated Pepe Character loads in the Viewport.

  20. Click Play in the 3ds Max Animation Controls to view the edited MotionBuilder animation.

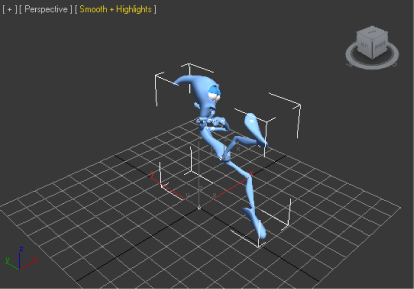
    Pepe's animation played back in 3ds Max

Summary

In this series of tutorials, you took different skeletons created in 3ds Max and exported them to MotionBuilder. In MotionBuilder, you characterized the bones, and animated the character.

Then, you made a few adjustments to perfect the motion, and exported the Pepe character back to 3ds Max.