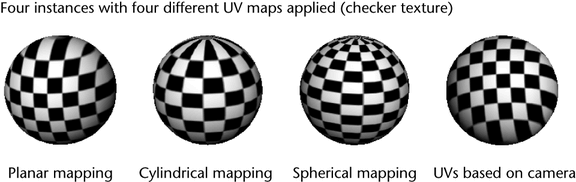
While you could always associate different instances of a particular shape with different materials, you can now associate different UV sets with different instances. This is very useful when baking shadows on instances of an object (for example, lighting a game level), or creating instances of a single shape with different textures (for example, a pile of boxes, some with holes in different locations, and so on).
When the UV sets are per-instance, the term UV set family refers to the associated UV sets which apply to different instances. Within a given family, a single UV set may be applied to one or more instances.
To create a per-instance UV map
 .
.
You can choose to share this UV set (every instance has the UV set), Per Instance Shared (all selected instances share the new UV set), or Per Instance Unshared (all selected instances get a unique UV set).
A new UV map is create for the selected instance that shares the name of the current set.
Different (per-instance) UV mappings should now be displayed on your instanced objects when you render them or display them in the scene view with Hardware texturing.
In the following example, we’ll bake shadows to a single map using per-instance UV sets. At that point, we can delete lights in the scene. This workflow is useful for creating texture maps on objects for game levels.
For more details about baking, see Lighting/shading > Batch Bake (mental ray).
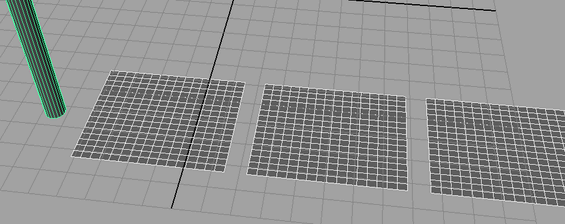
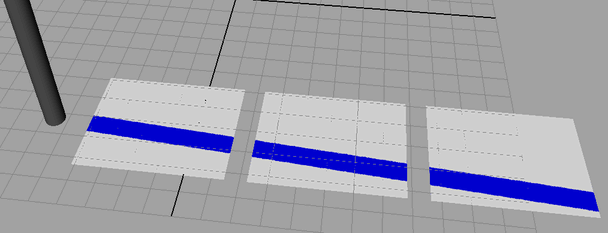
In this simple scene, there is a long cylinder to cast shadows, a directional light, a small plane with 16 x 16 subdivisions, and two additional instances of the plane.
 .
.
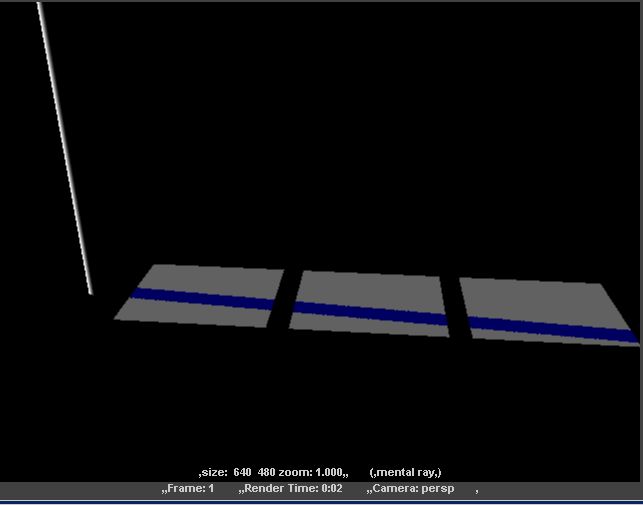
You may need to adjust the direction of the light and re-render so that the shadow falls on each polygonal instance in a different location, as in the above render.
Now we can create UV sets per instance on the planes.
.
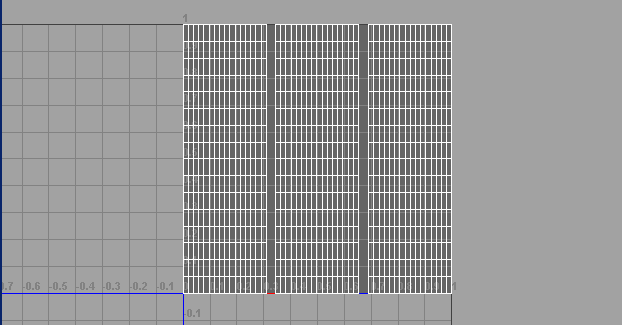
and selecting: You’ve now created a per-instances UV set whose UVs don’t overlap in UV space. (You can use the UV Texture Editor to confirm this and move UVs if necessary.)
Now we’ll bake the shadows to a single UV map.
Baking to per-instance UV sets
.
While the shadows are baked, you now have to connect the bake set to the UV map.
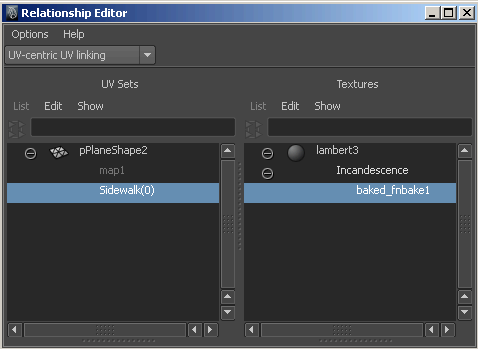
The shadows are baked and properly linked. You can see this in the Scene view if you’re in Shaded mode (Hotkey: 6) or High-Quality rendering mode.
Deleting UV sets works slightly differently now that there can be UV set families shared between instances.
For example, a per-instance set family named myMap has two child sets. One is applied to multiple instances (instances a, b, and c) and one is applied only to instance d. It is the current UV set. If you select instance d, and select Delete Current UV Set, only the map on instance d is deleted. (The other UV map is used by unselected instances and is not deleted.)
If you then select instance a and select Delete Current UV Set, the UV set is unshared from instance a, but still exists on instances b and c. To delete it altogether, you can then select instances b and c and select Delete Current UV Set.
 Except where otherwise noted, this work is licensed under a Creative Commons Attribution-NonCommercial-ShareAlike 3.0 Unported License


