


You can create waves and curls easily by using either the hair system Clump Curl or Curl attributes in the Displacements section. This is in general preferable to directly shaping the Start and Rest position curves, as you don’t need to simulate nearly as many CVs. (Also, highly curled Rest curves can result in unstable animations.)
As a rule of thumb it is preferable to use low CV count curves for the simulation and then apply detailed shaping to the result of the simulation, increasing Sub Segments on the hair system when more visual detail is required. However large scale shaping of the hair generally must be done by editing the Start and Rest curve positions. Clump Curl determines how much the hair clump curls about the central axis of the clump. For very tight curls you might need to type in values outside the range of the graph. You might also need to increase Sub Segments when doing this. The graph determines the rate of curl along the clump with a value of 0.5 being no curl. If desired you can reverse curl direction mid clump. The displacement Curl is relative to the center of each hair, rather than each clump. The amount of this curl displacement is relative to the Hair Width, so if you change the Hair Width you may need to change the Curl displacement.
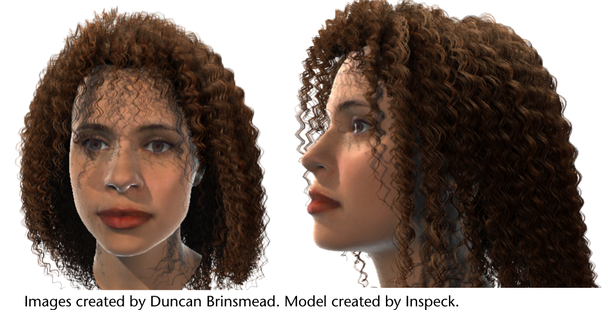
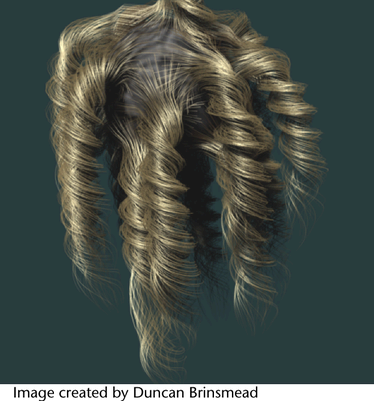
You can create frizzy or kinky hair by using the Curl displacement combined with a high Curl Frequency and a large Sub Segment count. The high Sub Segments may slow down refresh, so you might want to lower the hair system Display Quality when doing this for faster playback. Curls are the same for all hairs in a clump. If the clump is narrow and the curl displacement is large, this will create corkscrew shapes. For “afro” style curls, or partly ironed kinky hair you might want to have less regular curling. The Noise displacement is different from the curl in that each hair within a clump gets a different displacement. Experiment with typing values outside the slider range for Noise, such as 2 or 3. Also, to see the effect of high frequency values, you will need to increase the Sub Segments.
Curls can have a fairly bouncy motion. In general, you should be able to get the desired behavior by running the simulation and playing with different Stretch Resistance, Compression Resistance, and Bend Resistance attribute settings. For very loose heavy curls, the length of the clump may stretch, like a “Slinky.” This can be achieved by lowering the Stretch Resistance and Compression Resistance values.
In terms of motion, kinky and wavy hair is frequently very damped and stiff, almost like a block of solid material. It helps to create your hair with a low CV count as this makes it easier to keep it stiff with lower Stretch Resistance, Compression Resistance, and Substeps values. Turning on Self Collide and using higher than default Friction values can help simulate the effect of interlocking hairs. You can also use Component to Component or Point to Surface constraints to lock hair positions. Using the Motion Drag and Start Curve Attract attributes can also help keep hairs bunched together
Curls that are not properly self shadowed will look flat. See the description of self shadowing for pony tails and braids in Create ponytails and braids. For more information about light and shadow attributes, see Lighting nodes.
 Except where otherwise noted, this work is licensed under a Creative Commons Attribution-NonCommercial-ShareAlike 3.0 Unported License