Use the Custom option to
define Red, Green, and Blue Gain curves that are used to generate
the grain signature.
Using the Mono option,
you can also apply custom monochrome noise, an option that is useful
if you are adding grain to monochrome clips. Monochrome noise does
not have to be black and white noise. You can adjust the Red, Green,
and Blue curves to tint the grain in cases where you are adding
grain to, for example, sepia monochrome clips.
To add grain by defining a custom colour
or monochrome grain signature:
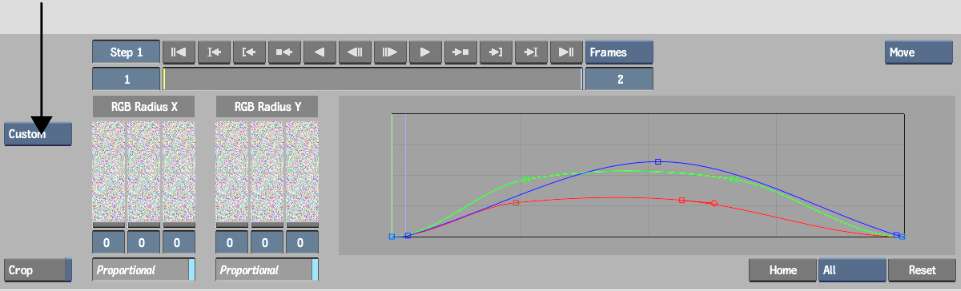
- From the Grain Signature box, click Custom
or Mono.
Instead of RGB sliders,
the Custom option provides Red, Green, and Blue Gain curves for
each channel that you can edit to produce the grain signature that
you need:
- If you select Custom, the noise associated
with the grain signature is colour noise.
- If you select Mono, the noise is monochrome,
though not necessarily black and white. You can tint the grain you
add by adjusting the Red, Green, and Blue Gain curves.
- To add grain to the clip, adjust the
Red, Green, and Blue Gain curves.
The Red, Green, and Blue
Gain curves represent the degree of grain added along the vertical
axis, and the corresponding luma value of the selected channel on
the horizontal axis. For example, to add grain primarily at the
higher luma range of the red channel, drag the right-most control
point of the red curve upward.
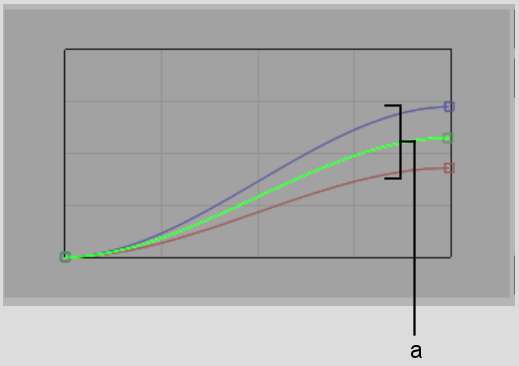
The Red, Green, and Blue
Gain graph provides a thorough set of controls that you can use
to modify the Red, Green, and Blue Gain curves as needed:
- Select the curve that you want to modify
by selecting the corresponding option from the Channel box below
the RGB Gain graph.
- To modify the shape of the selected curve,
press Alt+M to select Move
edit mode and then drag its control points.
- To add control points to the selected
curve, press Alt+A to select Add
edit mode and then click the curve at the location where you want
to add the control point.
- To delete control points from the selected
curve, press Alt+D to select Delete
edit mode and then click the control point that you want to delete.
- Use the other edit mode options as needed.
Editing these curves and the options you can use are similar to
editing animation curves. See
Editing Keyframes.
- To undo the previous modification, click
Undo.
- To reset the RGB Gain curves, click Reset.
- To adjust the radius of the grain along
the X-axis, drag the RGB Radius X sliders:
- Enable Proportional and drag the RGB
Gain sliders to add grain proportionately to the R, G, and B channels.
- Disable Proportional and adjust the R,
G, and B channels independently to fine-tune the grain radius.
- To adjust the radius of the grain along
the Y-axis, drag the RGB Radius Y sliders:
- Enable Proportional and drag the R, G,
and B Gain sliders to add grain proportionately to the R, G, and
B channels.
- Disable Proportional and adjust the R,
G, and B channels independently to fine-tune the grain radius.
- When you are satisfied with the result,
click Process to add grain to the clip.