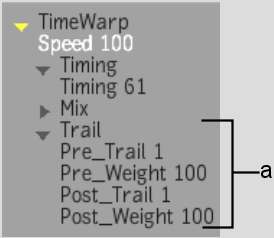
With trails, you have
greater control over how frames are blended. You can add a trail
to the image that precedes or follows the object:
- A pretrail mixes the frames that follow
the current frame with the current frame. In the final clip, the
image trail precedes the object.
- A posttrail mixes the frames that precede
the current frame with the current frame. In the final clip, the
image trail follows the object.
The number of frames
used in the mix is set with the pretrail and posttrail timing curves.
Since you can change the shape of the timing curves, the trail values
can be varied in the clip. When you use a pretrail or a posttrail,
the mix value is not used.
To add a constant pretrail or a posttrail
to an element in the timeline:
- Select an element in the timeline and
add a Timewarp soft effect.
- In the Timewarp quick menu, select Trail
from the Timewarp Processing option box.
The Trail fields appears.
- Set the pretrail or posttrail value in
the corresponding field.
- Set the fall-off value for the trail
in the Weight field. The Pre and Post field each have one Weight
field to their right.
- When the Weight is set to 100%, there
is no fall-off. The first image in the trail has the same intensity
as the image in the current frame.
- When the Weight is set to 0%, the image
in the current frame is at 100% intensity and the first image in
the trail is at 0% intensity.
To add an animatable pretrail or a posttrail
to a clip in the Timewarp Editor:
- Select an element in the timeline and
apply a Timewarp soft effect.
- Click E beside the Timewarp soft effect
button.
- Open the Trail folder in the Timewarp
Editor.
- Select the PreTrail and/or the PostTrail
option.
The channel for the selected
trail appears in the Timewarp Editor.
- Use the Animation controls to set the
timing curve for the trail by adding and moving points on the curve.
- Set the fall-off value for the trail
in the Weight channel. Each PreTrail and PostTrail channel has one
Weight channel.
- Click the
 button in the Player to
preview the result of applying the trail curve to the source clip.
- When you are satisfied with the results,
click Process to process the clip.
NoteIf your timewarp
contains trail values, you can preview the result in the Player
without rendering by using the Preview FX mode.


