You can load a clip with
clip history into Batch to display a process tree that recreates
the clip from its original sources, through all operations and effects,
to its final output. You can then modify the process tree at any
point. Once you have modified a clip, you can process it to create
new clips, which, in turn, also have their own history.
NoteOnce a clip is processed in Batch, the modules
in its history are replaced by a Batch module that is ineditable
on the EditDesk.
To expand a clip's history in Batch:
- Bring
a segment with history into Batch.
There are multiple options
for bringing one or more segments into Batch or a Batch FX level.
See
Creating Batch FX.
- Drag a Desk node to the Batch schematic.
The EditDesk appears.
- Select the clip with clip history and
click Exit Clip Select.
- Double-click the clip in the Batch schematic.
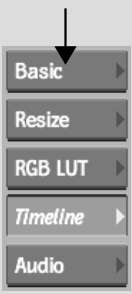
- Click Basic.
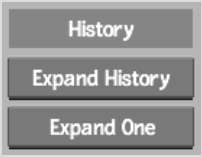
- Do one of the following:
| Click: |
To expand: |
| Expand Hist |
The entire clip history into a Batch process tree. |
| Expand One |
The most recent step of the selected clip's history.
If the input clip to the last node also contains history (denoted
by “H” in the clip name), you can also expand
the history for that clip.
|
NoteUsing Expand One
to display a clip's history will not display any Action media. If
you want to expand the history of clips on any media, you have to
convert the media into Batch Action media, and then expand the history
for that clip.
- Edit, add, or remove nodes, or connect
and disconnect nodes and clips as you would in any Batch structure.
See
Batch Processing.
- Add a BFX Output node to the
process tree, set the processing options, and then click Process
to render the Batch tree. See
Outputting Batch Results.
The new clip is added
to the specified destination. The original clip remains unchanged.


