Use Batch to assemble a series of tasks using nodes. Each node represents a specific Flint function. You connect clips with nodes and use the result of one node as the source for the next node. As you assemble this arrangement in the Batch schematic, you are building a process tree that processes as many output clips as you want. Intermediate clips can be processed as well.
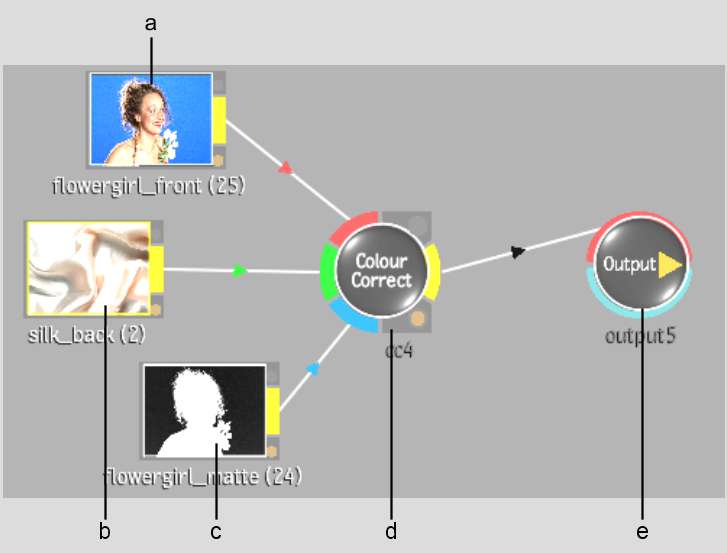
A process tree begins with a clip, contains at least one node, and ends with an Output, BFX Output, or Export node. The following example shows a simple process tree that performs a colour correction using a front, back, and matte clip.


(a) Front clip (b) Back clip (c) Matte clip (d) Colour Correct node (e) Output node


Before you can process, a process tree must end with either a BFX Output, Output, or Export node. Batch uses these nodes to process the result of the process tree to the specified destination in the Queue Manager. See BFX Output Node, Output Node, Export Node, and Outputting and Exporting Batch Results.
The final clip is stored on the Desktop or in a library. See Previewing Results and Outputting and Exporting Batch Results.