After recording brush strokes, you can apply them to the front clip using the Play option, which is activated automatically when you finish recording the paint strokes.


(a) Indicator
The number of strokes is divided by the length of the stroke, defined by the second timebar.
The indicator in the second timebar is identical to a track in the Channel Editor. For more information on using tracks, see Animation.
| Enable: | To: |
|---|---|
| Part | Play only a part of the recorded strokes. AutoPaint applies the strokes to a frame, erases those strokes, and moves to the next frame. This has the effect of creating streaks on your rendered clip. |
| Backward | Play the paint strokes backward. |
| Distance | Play paint strokes based on distance. AutoPaint divides the length of paint strokes by the number of frames to determine what to render in each frame. |
| Stroke | Play the paint strokes simultaneously. |


![]()
(a) Animation Type box (b) Frequency field


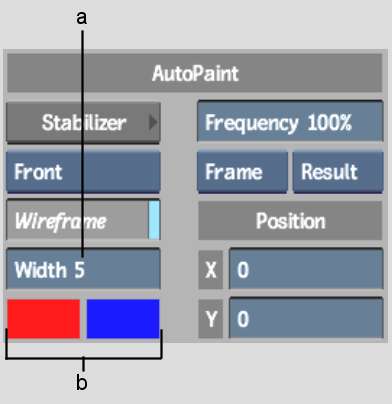
(a) Width field (b) Wireframe colour pots
The wireframe preview shows the complete path(s) of the painted strokes. It also shows what will be painted in each frame as set using the second timebar.
You can set the width of the wireframe using the Width field. You can also change the colour of the path and progression wireframes using the colour pots beneath the Width field.
For Path animation, you define how often AutoPaint reads the Channel Editor values when rendering the points or stamps that make up a given stroke. At a frequency of 100%, AutoPaint reads the Channel Editor values the most frequently.
For example, assume you set your AutoPaint sequence of 100 stamps to run over 10 frames using Path animation. If you set the Frequency field to 100%, AutoPaint reads the Channel Editor values 10 times every frame. If you set the Frequency field to 50%, AutoPaint reads the Channel Editor values 5 times every frame.
You can animate the following parameters: