You control the speed of an object on a motion path by modifying the spline. Modify the spline by moving a vertex to a different location. To slow down an object, break a vertex's tangent handles so that you can reshape the spline and redirect the object. To speed up the object, delete a vertex or two from the spline to make it smoother.
Adding Keyframes to a Motion Path
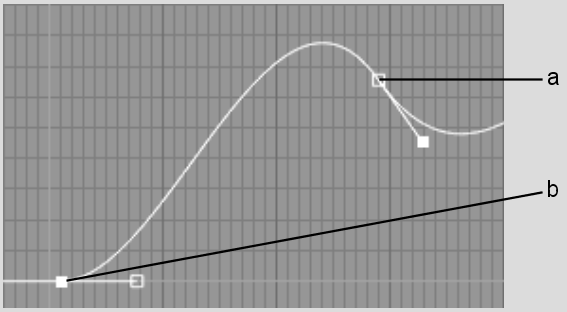
You can add vertices to a motion path. Adding vertices to a motion path also adds a keyframe to the speed curve. The vertex and keyframe are locked, which means that moving the vertex also affects the keyframe. A locked keyframe is represented by a solid square.


(a) Unlocked keyframe (b) Locked keyframe
You can also add keyframes to the speed curve to change the speed of an animation between vertices on the motion path. Adding a keyframe directly to the speed curve does not add a vertex to the motion path; the keyframe is unlocked. You can change the timing of the animation without changing the position of the motion path.
Removing Keyframes from a Motion Path and Speed Curve
You can delete a vertex from a motion path or delete a keyframe from the speed curve. Deleting a vertex from the spline deletes its associated keyframe from the speed curve, affecting both the shape and speed of the animation. Deleting a locked keyframe from the speed curve unlocks its associated vertex on the spline, allowing you to change the shape of the spline without affecting the animation's speed.
To delete a vertex from the motion path:
Use Select to edit a particular spline when more than one motion path appears in the image window.