Show in Contents

Add to Favorites

Home: Smoke

Restoring Entries from an Archive

Archiving

Recovering an Archive

Setting Preferences When Restoring
Archives from Previous Versions
In
versions earlier than 6.0, archives
did not include all the metadata information that version 2009.1 needs
to restore archives with the correct scan mode and aspect ratio.
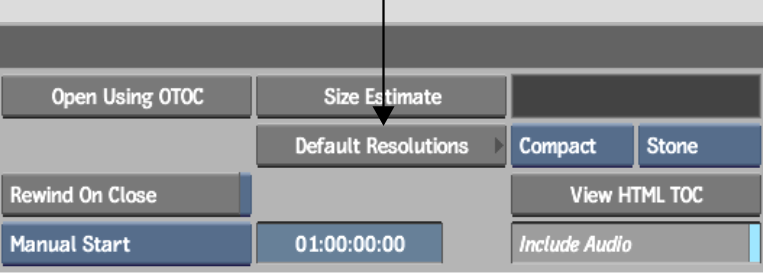
The Default Resolutions menu makes it possible to assign the scan
mode and aspect ratio preferences to older archives. The information
you need to assign depends on the software version in which the
archive was created. Assign the information using the Default Resolutions
menu. Use the following table to determine which information you
need to assign to your old archive.
| Archived clips prior to: |
Information you must assign: |
| Smoke 6.0, Fire® 6.0, Inferno 5.5, Flame 8.5, Flint 8.5,
and Backdraft 5.5
|
Scan mode |
| Smoke 5.2, Fire 5.2, Inferno 5.0, Flame 8.0, Flint 8.0, and
Backdraft 5.0
|
Scan mode and aspect ratio |
The parameters listed
in the Default Resolutions menu act as default values for all listed
resolutions. For example, if you want to change the default values
for PAL clips, you must change the values for the PAL entry, which
is the entry that has a width value of 720 and a height value of
576. If you are working with a PAL archive created in an earlier
version, the aspect ratio would have automatically been set to 1.3333,
but you may want to restore all your PAL archives with 16:9 aspect
ratio. You can change this setting by changing the aspect ratio
to 16:9 for the PAL entry.
NoteYou should only restore
an old clip at one resolution. If you restore versions of the same
clip at different resolutions, you may encounter problems with the
clip.
To add an archiving preference:
- In the Archive menu, click Default Resolutions.
The Default Resolutions
list and menu are displayed.
- Enter values in the Width and Height
fields.
- Select a default aspect ratio value
from the Aspect Ratio box or enter a custom value in the Aspect
Ratio field. Specifying a unique aspect ratio causes the Aspect
Ratio box to show Custom automatically.
- From the Scan Mode box, select Progressive,
Field 1, or Field 2 to determine how the lines of the contents of
the archive are scanned.
- From the Framerate box, select a framerate.
- Click Add Resolution.
- Click Apply Changes.
The new archive preference
is added to the list.
To open an archive using a selected archive
preference:
- In the Archive menu, click Default Resolutions
to display the Default Resolutions menu.
- Add new preferences to correspond to
a specific clip resolution contained in the archive that you plan
to open.
- Open the archive created in an earlier
version.
TipIt is recommended
that you open the archive with Open Read Only selected since you
are opening an archive created in an earlier version. When you open
in Read-Only mode, an auto test is not executed.
- In the Archive menu, click Load.
- Select the clips to be loaded from the
archive.
- If you want to see the preference that
is applied to the clip, press Alt as
you drag over the clip.
The applied preference
appears in the message bar as you drag over the clip.
- Continue restoring the archive.
To edit an existing preference:
- In the Archive menu, click Default Resolutions.
- In the Default Resolutions list, select
the entry you want to modify.
- Modify the values and press Enter after each change.
- Select Edit Resolution.
- Click Apply Changes.
The changes are applied
to the selected preferences.
To delete an existing preference:
- In the Archive menu, click Default Resolutions.
- In the Default Resolutions list, select
the entry you want to delete.
- Select Remove Resolution.
- Click Apply Changes.
The selected resolution
is removed.


