A Batch FX is created by bringing a selection of timeline segments into a BFX level. You enter a BFX level from the EditDesk record timeline or from the timeline of the clip in the current BFX level. You can bring segments with their soft effects into a BFX level. A Batch FX is applied on top of the segments and their soft effects. Or, you can enter a BFX level with a single segment's source, leaving its soft effects intact on the timeline one level up. A Batch FX is applied to the source before anything else affects it.
To apply a Batch FX to segments and their soft effects, you enter a BFX level with the Post option. You can enter with a contiguous selection of horizontal or vertical segments. Bringing in multiple segments is useful for continuing work that was done in context of the EditDesk record timeline or for bringing a selection of segments into the same Batch FX level.
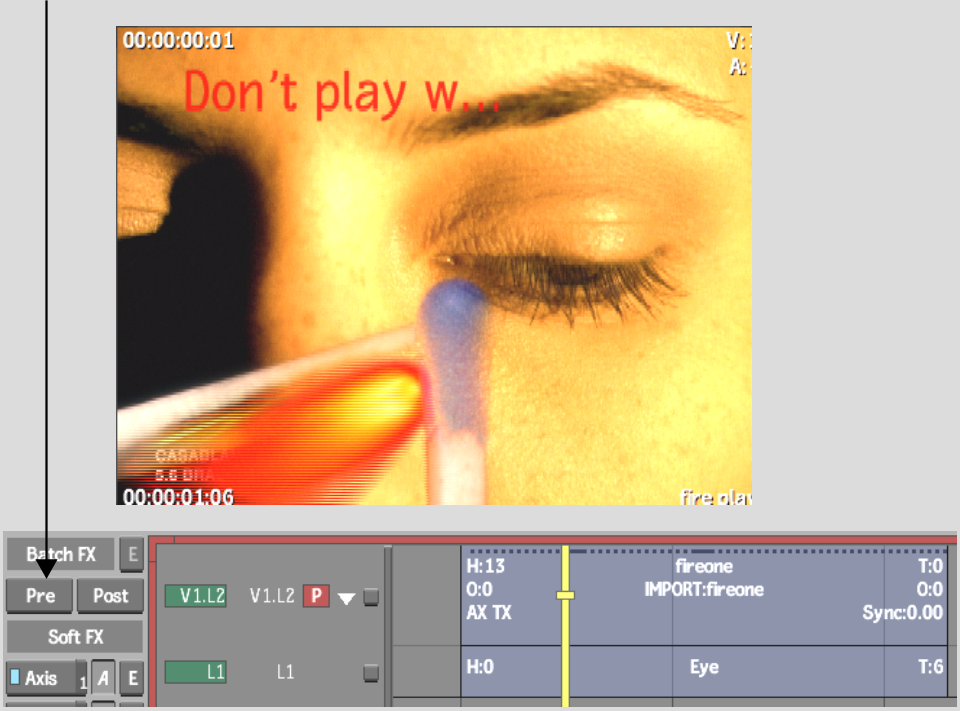
To apply a Batch FX to a source and not its soft effects, you enter a BFX level with the Pre option. You can enter with only one segment. Bring in only a source to make changes such as removing pulldown that you want to do before the soft effects. When you go back to the EditDesk record timeline, the soft effects are reapplied to the modified source.
Each time you access a Batch setup, you enter another BFX level. Therefore, a clip can have multiple nested Batch setups. Whether you enter a BFX level from the EditDesk record timeline or from the current BFX level, you enter with the Pre or Post option.
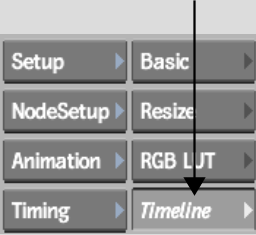
To enter a BFX level with a segment's source:


The segment’s source is loaded as a clip in a new Batch setup. In the following example, the source segment is brought into a Batch setup without its Axis Key and Text soft effects.


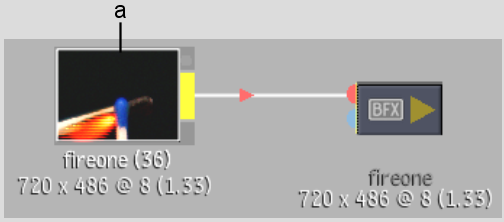
(a) Source segment brought into a Batch setup with the Pre option.


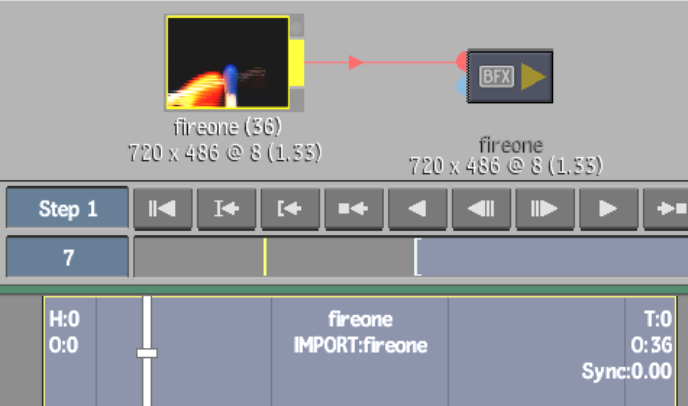
Note that the Axis and Text soft effect indicators are not on the clip’s timeline.


In the following example, a Flip node is applied to the source.


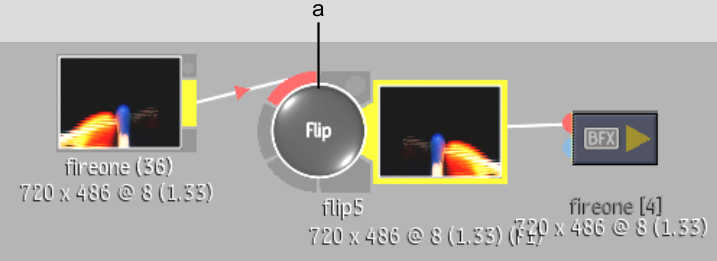
(a) Flip node added to source
Only the source segment brought into the BFX level is modified with the Flip Batch FX. The Axis Key and Text soft effects are reapplied on top of the modified source.
The timeline segment is pale magenta, replacing the original timeline selection. A white BFX icon indicates that a Batch setup is applied exclusively to a source.


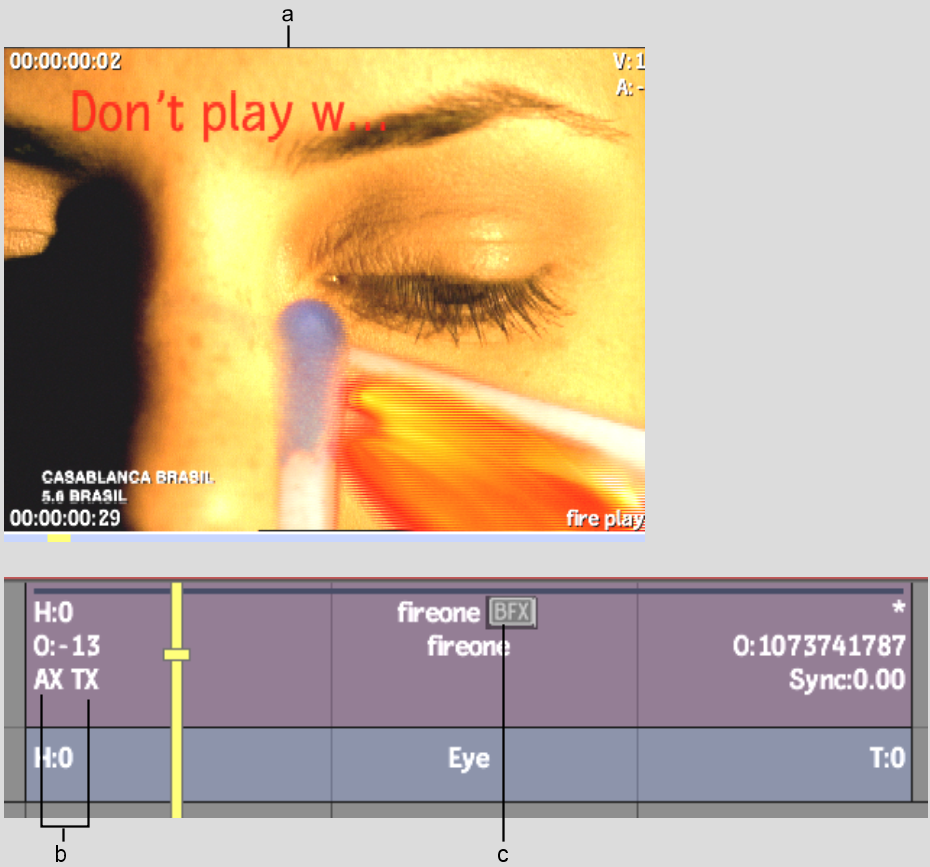
(a) Result clip (b) Axis Key and Text soft effect indicators (c) BFX icon
Image courtesy of Casablanca
Creating Batch FX is an iterative process. Each time you bring a source into a BFX level with the Pre option, the most recently modified source is loaded.
In the following example, the Flip effect is part of the new source segment. If you bring the segment into a new BFX level with the Pre option and create a Batch FX, the setup is applied to the modified source.


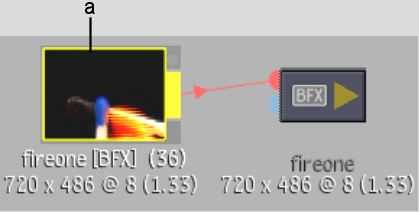
(a) New source segment
In addition to applying a new setup to a modified source, you can continue to edit the current Batch setup. See Editing Batch FX.
To enter a BFX level with a segment's soft effects or with multiple segments:
You can select multiple segments or a specific segment. If you select multiple segments, they must be contiguous horizontally or vertically. However, it is not necessary to select an entire stack of vertical layers.


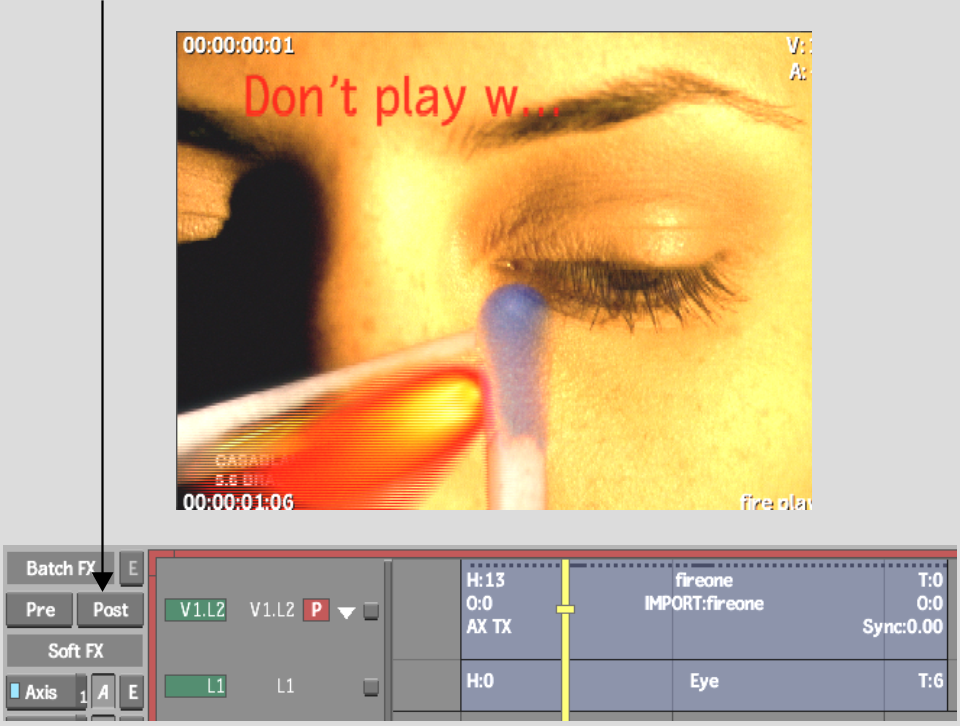
Image courtesy of Casablanca
The segments along with their soft effects are loaded as a clip in a new Batch setup. In the following example, the Axis Key and Text soft effects are brought in with both layers from the EditDesk record timeline.


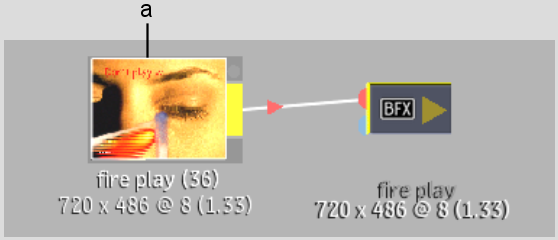
(a) Source segment and applied soft effects brought into a BFX level with Post option


If you did not make an explicit selection on the record timeline and in and out points were set, all segments on all layers between the in and out points are brought in. If in and out points were not set, only the segment under the positioner's focus point is brought in. Head and tail frames are displayed for reference.
Note that the Axis and Text soft effect indicators are on the clip’s timeline.


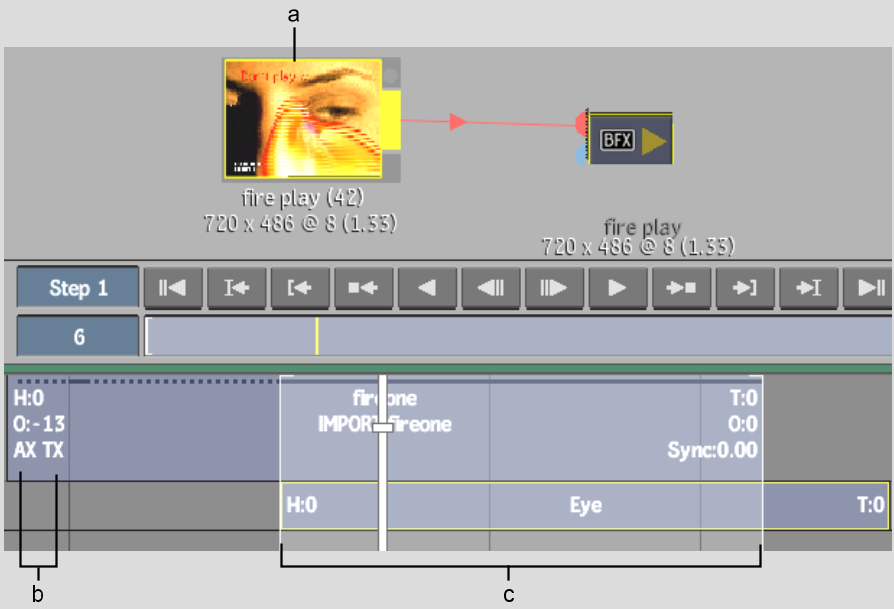
(a) Selected clip (b) Axis and Text soft effect indicators (c) In and out points on clip layers
To modify the source and its soft effects, drag a node to the process tree and adjust the settings. In the following example, a Flip node is applied on top of the original front segment and its Text soft effect. See Batch: Node Reference.


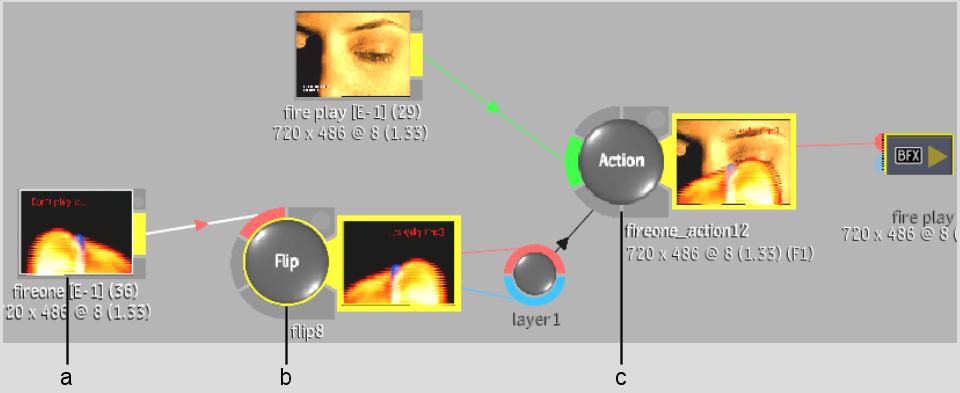
(a) Clip with Text soft effect (b) Flip node (c) Action node
The Flip Batch FX is applied on top of the original front segment and its Text soft effect. The segment is pale magenta indicating that a Batch setup is applied to the clip. A black BFX icon indicates that the Batch setup is also applied to the clip's soft effects. The soft effect indicators are not displayed because a Batch setup has been applied on top of the soft effects. Enter the Batch setup to access the soft effects.
If you entered Batch with more than one layer, the layers are collapsed into one segment on the bottom layer of the original selection. The segment takes on the length of the original selection or the length defined by the selection's in and out points.


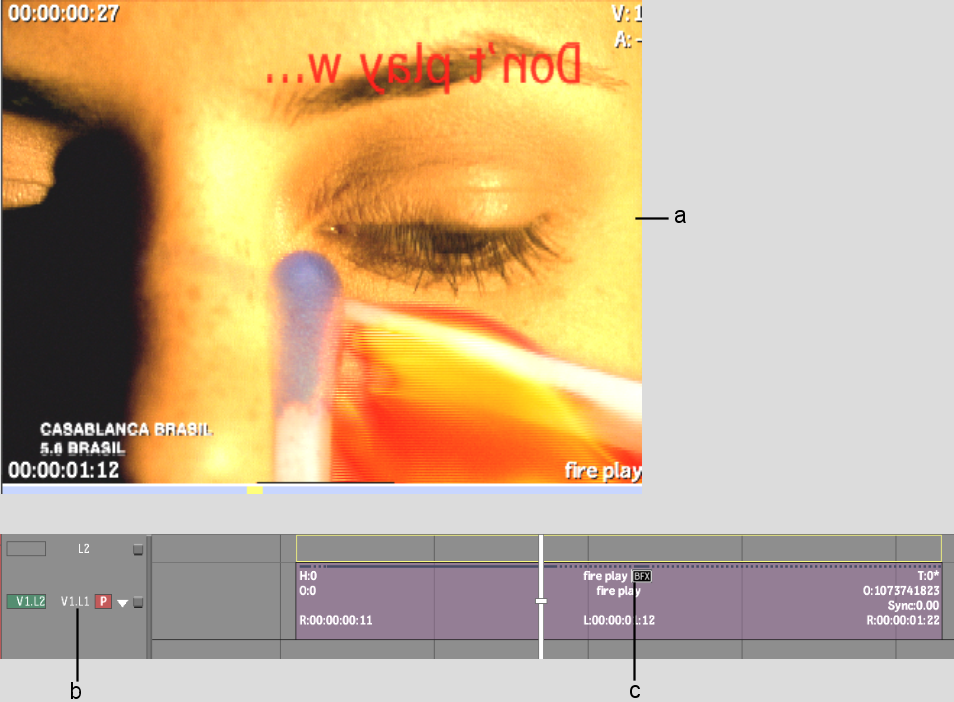
(a) Flip Batch FX applied to clip and Text soft effect (b) Layers collapsed on bottom layer (c) BFX icon
Image courtesy of Casablanca
Creating Batch FX is an iterative process. You can apply a Batch FX to a segment in any Batch level. In the following example, the segment with the Text soft effect is brought into a new setup (BFX 2) with the Post option. A Paint node is applied to the clip and its Text soft effect.


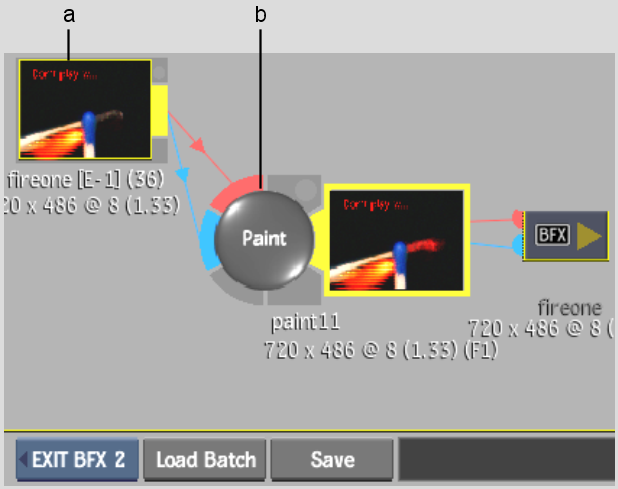
(a) Clip with Text soft effect (b) Paint node
In addition to applying a new setup to a modified source and its soft effects, you can continue to edit the current BFX setup. See Editing Batch FX.