Although 24p projects allow you to remove 2:3 or 3:2 pulldown from film-based sources on 60i tapes during the capture process, you can also capture the 60i sources as is, and then remove pulldown on the EditDesk.
EditDesk-based removal and insertion is also useful if your clips originate from the filesystem and were imported rather than captured from tape. Image import and export does not support automatic pulldown removal.
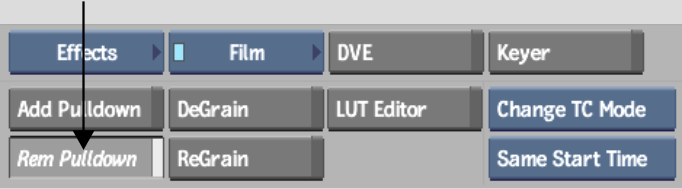
To remove pulldown on the EditDesk:


| Select: | To: |
|---|---|
| Keep TC Mode | Keep the 29.97 fps timecode of the source clip. |
| Change TC Mode | Change the 29.97 fps timecode to 23.97 fps timecode. |
| Select: | To: |
|---|---|
| Same Start Time | Use the 29.97 fps start timecode of the clip as the 23.97 fps start timecode of the result clip without converting it. |
| Same Start Frame | Convert the 29.97 fps start timecode of the clip to 23.97 fps and then use the result timecode as the start timecode for the result clip. |

The new clip with only the original 24 film frames is processed and appears on the Source Area.
To insert pulldown on the EditDesk:

| Select: | To: |
|---|---|
| Keep TC Mode | Keep the 23.97 fps timecode of the source clip. |
| Change TC Mode | Change the 23.97 fps timecode to 29.97 fps timecode. |
| Select: | To: |
|---|---|
| Same Start Time | Use the 23.97 fps start timecode of the clip as the 29.97 fps start timecode of the result clip without converting it. |
| Same Start Frame | Convert the 23.97 fps start timecode of the clip to 29.97 fps and then use the result timecode as the start timecode for the result clip. |
| Select: | To output with: |
|---|---|
| Auto | 29.97 frames per second drop-frame or non-drop-frame timecode |
| 30 fps | 30 frames per second timecode |
| 29 fps DF | 29.97 frames per second drop-frame timecode |
| 29 fps NDF | 29.97 frames per second non-drop-frame timecode |
| Select: | To: |
|---|---|
| The first frame | Insert 2:3 pulldown. The result clip has the following sequence: AA, BB, BC, CD, DD. |
| The second frame | Insert 3:2 pulldown. The result clip has the following sequence: AA, AB, BC, CC, DD. |
The new clip with 29.97 frames is processed and appears on the destination reel.


