Show in Contents

Add to Favorites

Home: Smoke

Tracking

Tracking

Four-Point Tracking

One-Point and Two-Point Tracking
In both one-point and two-point tracking, you select
the object that follows the pattern on the back clip by assigning
the tracking data to its axis in Action.
For one-point tracking, you use only one tracker
(usually Tracker1) to generate position information. For two-point
tracking, you use a second tracker (usually Tracker2) to generate
rotation and/or scaling information. The Stabilizer obtains this
information by comparing the position of Tracker2 to that of Tracker1.
Before you select the two reference points on
the back clip, note the task of each tracker:
- Tracker1
follows the horizontal and vertical translation of the reference
point. You should position Tracker1 over a point on the pattern
that you want to track.
- Tracker2
tracks the rotation and/or the change in size of the pattern. In
the first frame, the rotation is always 0 and the scaling factor
is always 100%. In subsequent frames, a rotation and/or scaling
factor is added if the relative position of the two trackers changes.
You should position Tracker2 over a point that represents the rotation
or change in size of the pattern.
When you open the Stabilizer from Action for
two-point tracking, you can select whether you want rotation information,
scaling information, or both. The choice depends on the movement
of the object to track and on the camera movement in the clip.
To
perform one-point or two-point tracking in Action:
- Load
a front and back clip in Action.
The front clip contains the object and the back
clip supplies the pattern that you want to track.
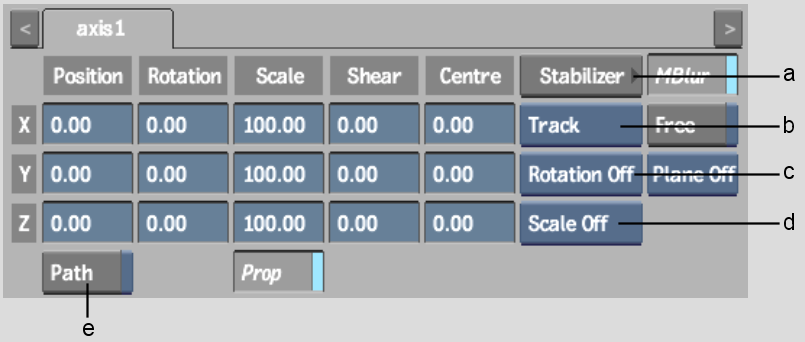
- In
the Axis menu for the selected media, make sure that the motion
path is disabled (Path button).
NoteDo not move the axis from its default position
at the centre of the image window before entering the Stabilizer,
or else the tracking data will be overwritten. Use the offset axis
to add an offset to the tracker movement instead.
- In
the Stabilizer Option box, select Track.
- From
the Tracking Rotation option box and Tracking Scale option box,
set the tracking options.
| Select: |
To: |
| Rotation Off and Scaling Off |
Do one-point tracking. |
| Rotation On and/or Scaling On |
Do two-point tracking. |
| Rotation Inv |
Invert the rotation data. |
| Scale Inv |
Invert the scaling data. |
- Click
the Stabilizer button.
The Stabilizer opens and the back clip appears.
NoteIf the wrong clip appears in the image window,
return to Action and change the back clip to the clip that contains
the pattern you want to track. For more information, see
Changing Media Clips.
- Position
the tracker(s) over the pattern(s) that you want to track, and click
Analyse to generate the tracking data.
- Once
you are satisfied with the tracking, make sure the trackers you
used are still active, and then click Return.
The Axis menu in Action reappears. The tracking data
is applied to the front clip.