Like a slide projector, textures can be projected onto 3D models and 3D text to create an effect where a texture is animated on an object in 3D space. The advantage of using a Projector node is that you can cast images on arbitrary surfaces. You can create a spotlight texture and project it onto a 3D model, so that you can see “into” it.
The texture projection properties are located in the Projector menu.


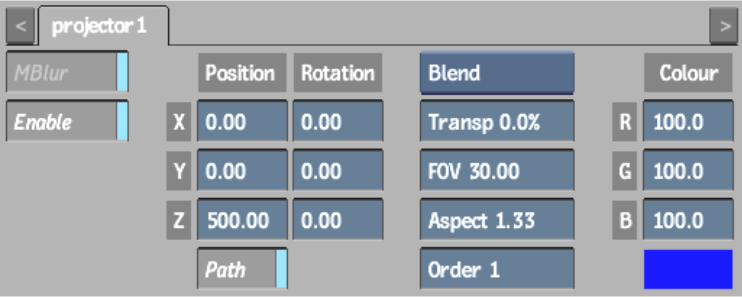
The Projector controls are described as follows.
MBlurEnables or disables a motion blur only for the projection.
Enable buttonActivates or deactivates the projected texture effect in the scene. When this button is disabled, the Projector node remains in the schematic and the projector icon appears smaller in the image area.
Position X, Y, and Z fields Position the projector in 3D space. You can also set the texture projector position by dragging the projector in the scene.
Rotation X, Y, and Z fieldsRotate the projector in 3D space.
Motion Path buttonEnables motion path animation for the projector.
Projection Blend Mode boxDisplays the projected texture effect. See Blending Projections.
Transparency fieldModifies the transparency of the projected texture effect. Transparency values are 0 to 100.
FOV fieldAdjusts the projector's field of view. FOV values are 1.00 to 180.00.
Aspect fieldSpecifies the ratio of height to width for the projected image. Aspect values are 0.10 to 100.00.
Order fieldSets the order of projectors.
RGB fields and colour potSpecify RGB colour values. You can also pick a colour with the colour picker.
The Projector node appears in the schematic and a projector icon appears in the scene.


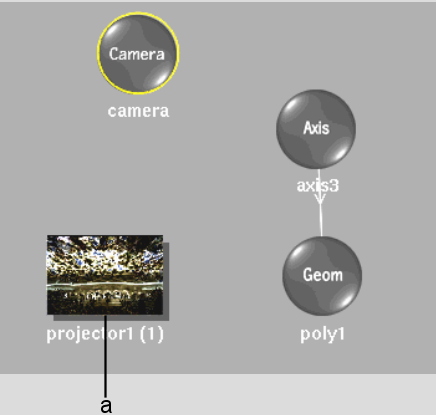
(a) Projector node
The following example illustrates projected media on a 3D model using Spotlight projection blend mode. See Blending Projections.


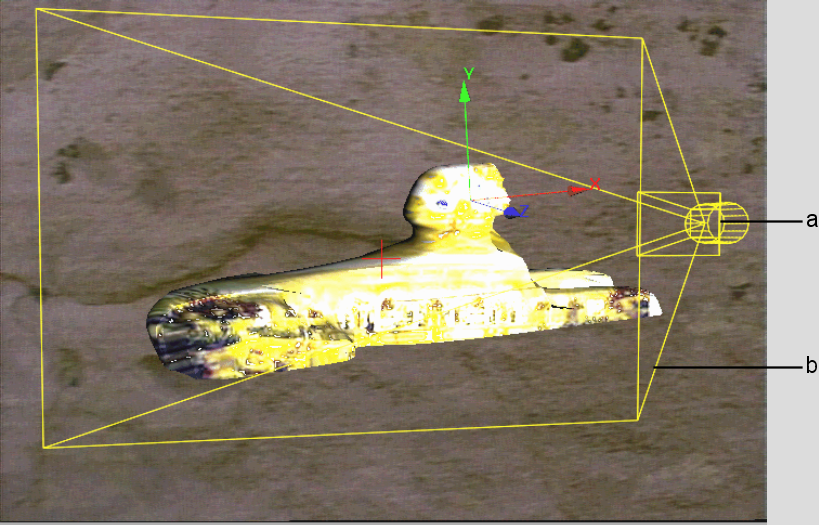
(a) Projector icon (b) Yellow outline shows the projector field of view
Multiple Projector nodes appear in the schematic and projector icons appear in the scene.
The front projector is projector1. A new projector is always added to the back. Changing the order number of a projector affects the order of other projectors.
Use projection blend modes to modify how you want to blend the projected image in the scene. Select a mode from the Projection Blend Mode box.


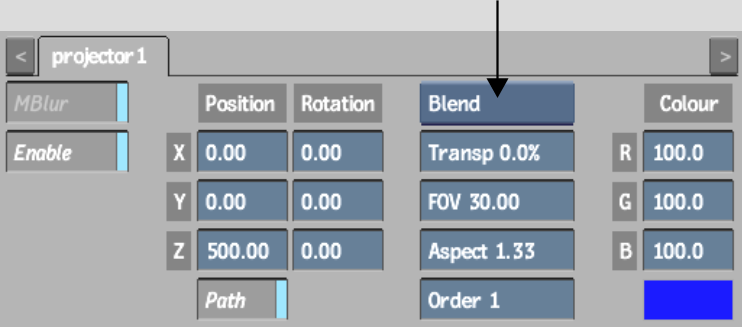
AddCompensates for the soft or anti-aliased edge on an object in a front and matte clip media.
BlendPunches the matte through the front. This blends the edge of the front clip and adds additional softness to the media. This is the default setting. Use Blend mode when you do not want any shading cast on the geometries that are receiving the projection.
MaxCompares the RGB channels of each pixel of the front clip and the back clip individually and returns the larger of the two values.
MinCompares the RGB channels of each pixel of the front clip and the back clip individually and returns the smaller of the two values.
MultiplyMultiplies the RGB channel values of corresponding pixels of the front clip and the matte clip, and normalizes the result by dividing by 256 in 8-bit mode, or 4096 in 12-bit mode. The resulting RGB channel values are assigned to the corresponding pixels in the generated clip.
Hardware limitations may prevent transparency from working properly with Multiply.
NegateCreates a negative-like result. Try Negate with a soft white matte with a white front clip. This mode does not use the matte or transparency in its blend.
ScreenMultiplies the inverse of the matte clip's colours with the colours of the front clip. The resulting colour is always lighter. Screen does not work with transparency.
When using a matte, set the diffuse r, g, b channels to 0, 0, 0 in the Channel Editor for the image surface you are blending.
Simple AddPunches the matte through the front using more softness than Blend mode. Simple Add mode is similar to Add but includes transparency.
SpotlightCreates a slide projector effect. This mode does not use the matte or transparency and decreases system performance.
Spotlight BlendCreates an effect where black areas of the front disappear. This mode does not use the matte or transparency; it works well with a clip on which an object is surrounded by black.
SubtractSubtracts the RGB channel values of the pixels in the matte clip from the RGB channel values of the pixels in the front clip and assigns the result to the RGB channel values of the pixel in the result.
If an RGB channel value from the matte clip is larger than the corresponding channel value in the front clip, yielding a negative result, that result is clamped at 0 (black).
Applying Selective Projections
You can use projections selectively; either inclusively or exclusively. Similarly to the Selective Lighting feature, you can connect a projection to an image, object, or its axis and make the projection affect only that connection (inclusive). Conversely, a projection that affects every object except the one it is connected to is exclusive.
To use selective projections, you must have a scene with a minimum of two objects in order for the selective projection to affect one and not the other.
To create an inclusive selective projection:
In the schematic, the projector is displayed much like an image. By default, it projects an image across the entire scene.


Once a selective connection is created, the projector only affects the object to which it is connected.


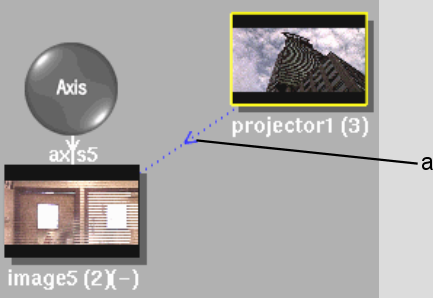
(a) Inclusive projection connection
Once an exclusive connection is created, the projector ignores the node(s) to which it is connected.


(a) Exclusive projection link