Interpolation
defines the shape of an animation curve between keyframes. You set
the interpolation mode to determine the smoothness of the transitions
for an entire curve or between keyframes. The smoother the transition
between each keyframe, the less jitter in your result.
The following table
describes the interpolation modes and illustrates the resulting
curves. You can set the default interpolation mode used when creating
animations in the Preferences menu. The default interpolation is
initially set to Hermite.
| Interpolation Mode |
Resulting Curve |
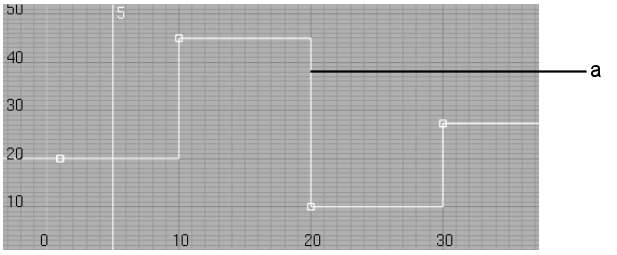
| Constant—Produces a square curve. The value
of one keyframe is held constant until the next keyframe.
|
|
| Linear—Joins keyframes using straight lines.
Linear interpolation may result in abrupt movement in the animation.
|
|
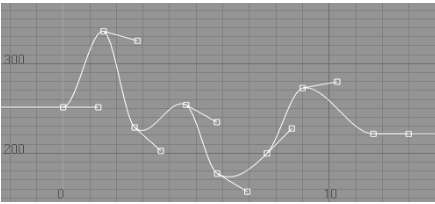
| Hermite—Produces a smooth curve with a smooth
transition between keyframes. Each keyframe on the animation curve has
an associated tangent handle. You can change the shape of the animation curve
by dragging the tangent handle. When you move a tangent handle,
it changes to a solid square.
|
|
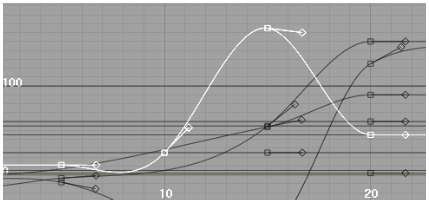
| Natural—Produces a smoother, more continuous
curve than Hermite. This animation curve has natural cubic splines,
similar to Hermite curves, but the tangents of the spline adjust
themselves automatically to match the first and second derivatives
at each keyframe. This results in a very smooth curve. Each tangent
is re-evaluated when you move a point on the curve.
|
|
| Mixed—You cannot select Mixed. This option is
shown automatically when you select two or more channels that have different
interpolation modes, or when an animation curve contains different interpolation
modes between keyframes.
|
|
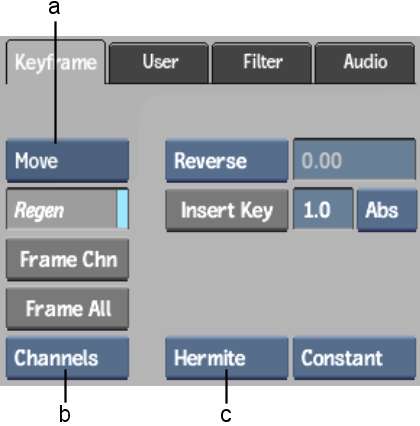
To change the interpolation for an entire curve:
- From the Channel View box, select Channels.
- From the Interpolation box, select an
interpolation mode.
As soon as you select
the interpolation, it is applied to the selected curve.
To change the interpolation mode between
keyframes:
- Select the first keyframe of a sequential
group of two keyframes in the animation curve that you want to change.
- From the Interpolation box, select an
interpolation mode.
The interpolation changes
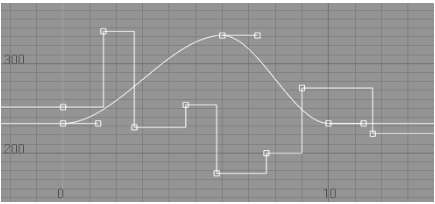
between the selected keyframe and the next keyframes. For example,
the following figure shows the results of changing a keyframe's
interpolation from Constant to Hermite in an animation curve that
uses Constant interpolation.
To change the interpolation mode for
a group of keyframes:
- Press Ctrl and
select the keyframes for which you want to change the interpolation.
TipWhile pressing Ctrl, you can also draw a selection
box around the group of keyframes you want to select.
- From the Interpolation box, select an
interpolation mode.
The selected interpolation
is applied to the keyframes.