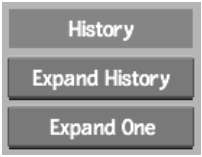
For some clips, you may have to modify their clip history in Batch. Do this for any clip that you created using more than one effect or operation. To gain access to the original sources and effects settings, you expand the clip into a Batch process tree.
If you edited clips together, and at least one of the clips has uncommitted clip history, you can only access that clip's history using the Batch timeline. The clip history for a segment can also be expanded into a Batch process tree.
Some nodes in a clip history tree appear as blank nodes. These wildcard nodes represent an effect that was applied to a clip that does not have an equivalent Batch node. They are named after the module used to create them. You can disconnect or connect these nodes, but you cannot modify their values. They contain frames rendered at their position in the process tree.
Because wildcard node frames are rendered, changes made upstream do not propagate downstream. If you need to make upstream changes, you must recreate the effect. To do so, you exit Batch and rebuild the effect in the module originally used to create it.
When expanding a clip's history, a node adopts the intermediate clip's name. For untitled clips, the node take a generic name (CC4, for example). You can also manually name the nodes.
You can load a clip with clip history into Batch to display a process tree that recreates the clip from its original sources, through all operations and effects, to its final output. You can then modify the process tree at any point. Once you have modified a clip, you can process it to create new clips, which, in turn, also have their own history.
To expand a clip's history in Batch:
See Creating Batch FX.


The new clip is added to the specified destination. The original clip remains unchanged.