Verify the analysis and
tweak the results if needed. You can delete any boxes that are not
surrounding legitimate artefacts. You can also tweak the contrast
setting on individual boxes if needed.
TipIf many boxes were
created as a result of motion in the shot rather than dust particles,
click Shot boxes to delete all boxes, increase the search area, click
Set as Default again, and re-analyse the shot. You may need to experiment a
bit to find the best value.
To tweak the analysis:
- Visually scan the first analysed frame.
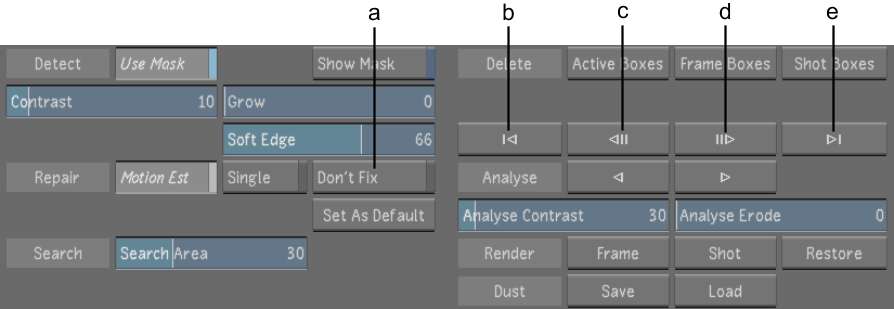
TipTo jump to the first
or last frame in a shot where an artefact has been identified, use
the First Analysed Frame button or the Last Analysed Frame button.
- If you see a box that is not surrounding
an artefact, or that you want to tweak, click inside it to select
it.
It becomes the only active
box on the frame.
TipClick the Previous
and Next Box buttons to move from box to box.
- If you need to see what has been removed,
click Don't Fix. This shows you the contents of the box with no
removal applied. If the artefact is genuine, click Motion Est again
to reapply the Motion Estimation repair type.
- Do one of the following as needed:
- If the removed object is not an artefact,
delete the box by clicking the Active boxes button or pressing Backspace.
- If the object is an artefact but is not
removed properly, tweak the Contrast, Grow and Soft Edge parameters.
Enable or disable Show Mask as needed. When Show Mask is on, red
pixels identify those areas affected by the removal process. Any
changes you make are applied only to the artefact in the currently
selected box.
- If you are still unable to successfully
remove the artefact, see
Single Frame Dust Removal.