When you enable the Edit
function, you can modify the sensitivity of any modifier (e.g.,
knobs, wheels, and rings). These items include the Grading, Curves,
Key, Geom, P&S, and Misc menu.
To edit the sensitivity of the Autodesk
Control Surface panels:
- On the Navigation panel, press the top
MORE button.
- Press the CURVES button to enter the
Panel menu.
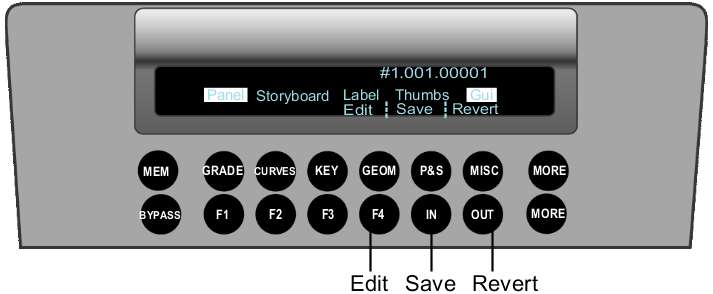
In the Panel menu you
can Edit (F4 button), Save (IN button), and Revert (OUT button)
your panel sensitivity changes.
- Press the F4 button to enable the Edit
mode.
- Touch any modifier you want to change
its sensitivity on the panel. Turn the modifier clockwise to increase
the sensitivity or counter-clockwise to decrease the sensitivity.
NoteThe Function panel
displays the Grade menu by default. To change the sensitivity of
the Curves, Geometry, Keyer, or Reposition menu, you must enable
the menu you want to modify first before entering the panel sensitivity
option.
When a control is selected,
its name and sensitivity are displayed on all the LCD panels. The
last line of the LCD displays the control you are modifying, its
value, and the enabled Edit mode.
NoteSome control names
are long and therefore are truncated on the Navigation panel LCD.
The Function and Grading panels display the full name and value.
- Press the F4 button again to disable
the Edit mode. You can now test out the new sensitivity value.
NotePressing F4 does
not exit you from the Panel menu.
NoteYou need to save
the rules file in order to commit your modification. If you do not
save the modification, you will lose the modified value(s) when
you quit Lustre.