Use the controls on the lower right of the control surface to change the view as you work on your grades. For example, enable Half to view a half-resolution version of your shot in the Player.
You can select any of the following options.
| Control Surface | Description | Hotkey or UI Option |
|---|---|---|
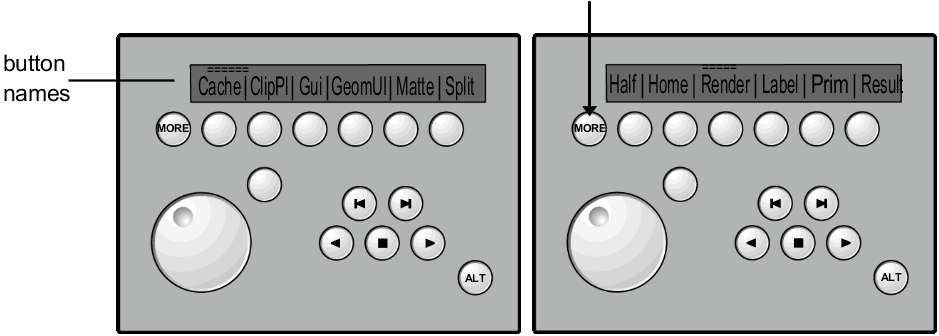
| GUI | Toggles the full-screen Player. | Enter |
| Geom UI | Shows or hides a geometry for the current secondary. | Show button in Secondaries menu |
| Matte | Switches between secondary view and result view. | F11 and F12 |
| Split | Switches on and off split view in the Player. When you enable Split, you can press the PERFM button to enable multi-view and view up to 16 shots, or press the CUE button to switch between horizontal and vertical split view. These buttons are located on the upper right of the control surface. | F5, F3, and F4 |
| Half | Switches between the full-resolution and half-resolution (proxy) version of your shot in the Player. If you have not rendered a proxy, an X appears in the Player. | F9 |
| Zoom/Home | Switches between the 1x and 2x zoom. | F10 |
| Render | Switches between a rendered version of your shot and output view. If you have not rendered the shot, an X appears in the Player. | P |
| Label | Toggles the shot name text on the image. | W |
| PRIM | Toggles the display of your shot. Displays your shot as it appears after modifications are made from the Grading or Curves menu, or as it currently appears (with the entire colour grade applied). You can use this option only after you have added secondaries. | I |
| Result | Displays the shot as it currently appears—with the grade applied. | O |