Like a slide projector, textures can be projected onto 3D models to create an effect where a texture is animated on an object in 3D space. The advantage of using a Projector node is that you can cast images on arbitrary surfaces. You can create a spotlight texture and project it onto a 3D model, so that you can see “into” it.
The texture projection properties are located in the Projector menu.


The Projector controls are described as follows.
MBlurEnables or disables a motion blur only for the projection.
Enable buttonActivates or deactivates the projected texture effect in the scene. When this button is disabled, the Projector node remains in the schematic and the projector icon appears smaller in the image area.
Position X, Y, and Z fields Position the projector in 3D space. You can also set the texture projector position by dragging the projector in the scene.
Rotation X, Y, and Z fieldsRotate the projector in 3D space.
Motion Path buttonEnables motion path animation for the projector.
Projection Blend Mode boxDisplays the projected texture effect. See Blending Projections.
Transparency fieldModifies the transparency of the projected texture effect. Transparency values are 0 to 100.
FOV fieldAdjusts the projector's field of view. FOV values are 1.00 to 180.00.
Aspect fieldSpecifies the ratio of height to width for the projected image. Aspect values are 0.10 to 100.00.
Order fieldSets the order of projectors.
RGB fields and colour potSpecify RGB colour values. You can also pick a colour with the colour picker.
The Projector node appears in the schematic and a projector icon appears in the scene.


(a) Projector node
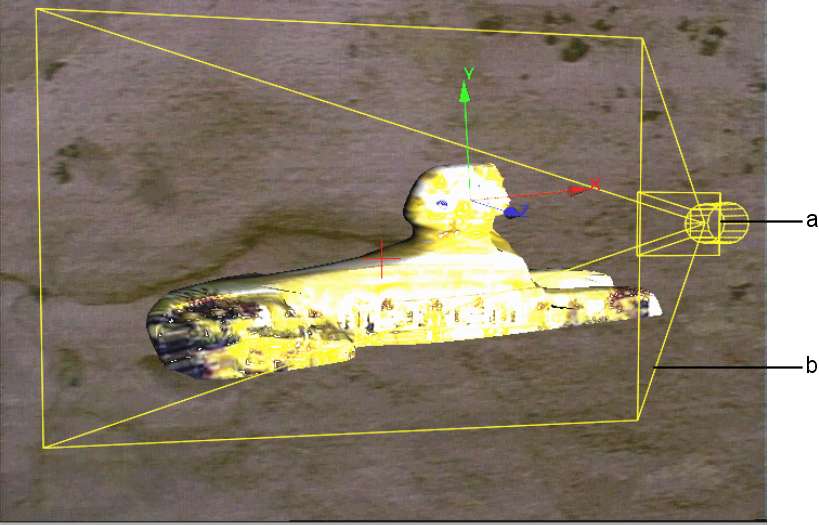
The following example illustrates projected media on a 3D model using Spotlight projection blend mode. See Blending Projections.


(a) Projector icon (b) Yellow outline shows the projector field of view
Multiple Projector nodes appear in the schematic and projector icons appear in the scene.
The front projector is projector1. A new projector is always added to the back. Changing the order number of a projector affects the order of other projectors.