Use the Import Image menu to import or soft-import
one or more QuickTime movies or MXF media files to the current clip
library. Both video and audio tracks are supported.
Audio files that are
not 48 KHz are automatically resampled to 48 KHz on import. For
video files that contain an alpha channel, you can maintain the
alpha channel in the imported clip for use in compositing.
Before importing any
P2 MXF content, ensure that the P2 recording devices that are used
are set to record clip metadata in Type 2. This allows important
metadata, such as timecode and the User Clip Name, to be assigned
properly in the MXF file.
Note that you cannot
import or soft-import P2 MXF content that contain 2:3 or 2:3:3:2
pulldown, or variable framerates (such as from Varicam cameras).
You can scan and import
P2 MXF clips whose directory names are either all uppercase or all
lowercase.
NoteTo import files created
using unsupported video file formats or codecs, you can use Cleaner® XL to encode the files
into a supported format. For example, use Cleaner XL to import video
as a sequence of compatible still images. See the guide, Using
Cleaner XL with Autodesk Visual Effects and Finishing Applications.
To import or soft-import a QuickTime
movie, MXF, or MPEG-4 media file:
- From the Library menu,
click Import Image and select a destination reel.
- From the File Format box, select the
format of the clip that you want to import.
NoteTo import XDCAM EX
clips, select MPEG-4.
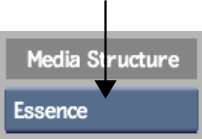
- If you chose MXF, then select an option
from the MXF Options box. Select P2 or XDCAM to import the associated
video and audio files. Select Essence to import only specific audio
or video files.
| Select: |
To: |
| P2 or XDCAM |
Import the associated video and audio files. |
| Essence |
Import only specific audio or video files. |
| Metadata |
Display in the Browser the clip name and the Media Filename, in
brackets.
|
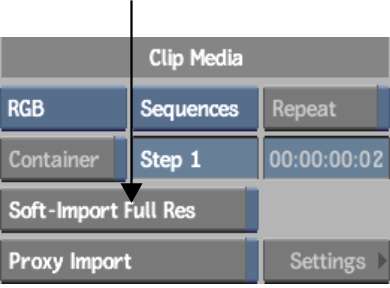
- Optional: Import the entire MXF content
and include only the audio files or only the video files. From the
Clip Media group, select an option from the Media Stream box.
This allows you to preserve
the clip while having the option of leaving out unwanted media.
- Browse to the directory containing the
files that you want to import. If you are importing MXF content,
then browse to the root directory containing the contents of the
P2 card or Professional Disc.
- Enable Scan Subdirectories to display
all the subdirectories and their contents.
For MXF content, the
available clip names appear in the browser.
- Select the files.
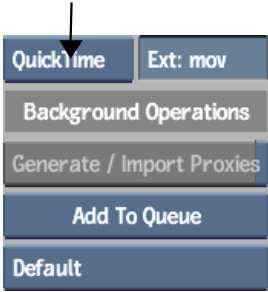
- Enable Soft-Import Full Res if you want
to import a reference to the media, but you do not want to store
the media on the local storage.
NoteCertain options are
disabled if you choose to soft-import the media.
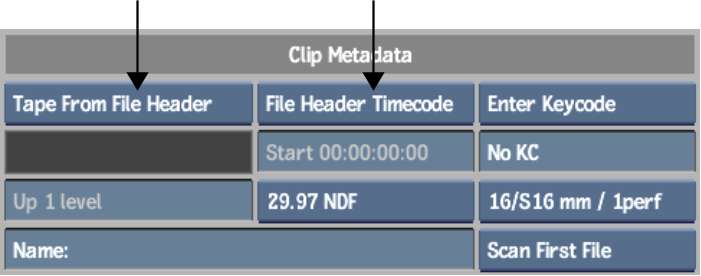
- Set the tape name for the imported clips
and adjust any other Clip Metadata properties.
For QuickTime files,
you can read the tape name and timecode from the file header, or
enter the tape name and timecode manually. See
Clip Metadata Group.
NoteA clip that is imported
using an unsupported frame rate is converted to the frame rate specified
for the current project. This causes the clip to appear out of sync
with its audio. A comment specifying the original frame rate is
added to the clip notes, providing the ratio needed if you choose to
re-time the video.
- If you are importing QuickTime files
originating from a Mac® computer,
apply gamma correction to bring the brightness of the image in line
with the rest of your project. From the Colour Correction Type box,
select Gamma, then from the Gamma Presets box, select Convert 1.8
to 2.2.
- In the Movie attributes area, ensure
that the codecs used in the video file are displayed.
- Click Load.
The media files are imported
to the Desktop and to the specified
library reel.