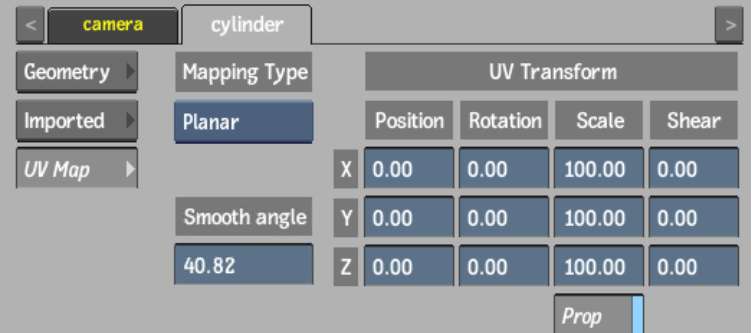
Use the UV Mapping settings to select how the UV coordinates of an attached displace, normal, or diffuse node are mapped to the 3D model. You can also apply axis transformations to the UV map. These transformations are different from the settings of the parent axis in that they transform the axes of the actual UV map coordinates.


UV Mapping Type boxSelect the type of UV mapping to apply to the attached Displace, Normal, or Diffuse node.
When a Displace or Normal node is attached to a geometry, a UV mapping type other than None is needed for the displace or normal pattern to have any effect on the geometry.
When a Diffuse node is attached to a geometry, you must select Wrap from the Mapping box in the Diffuse menu to be able to use the UV mapping settings. See Diffuse Mapping.
Smooth angle fieldDisplays the angle at which the edges of an attached Displace node become hard. Depending on the displacement map you are using, you may need to use this field to smoothen or harden the edges. Changes to this field only affect the shading of the displacement, and not the shape.
Position fieldsDisplays the position of the selected UV axis.
Rotation fieldsDisplays the rotation of the selected UV axis.
Scale fieldsDisplays the scale of the selected UV axis.
Prop Scale buttonScales the X, Y, and Z UV axes proportionally.
Shear fieldsDisplays the shear of the selected UV axis.