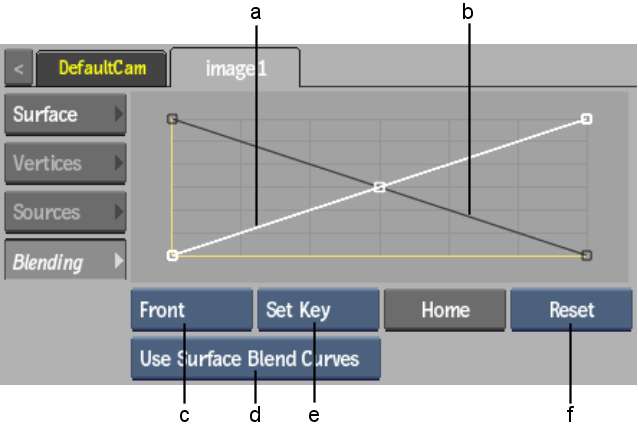
You can adjust the blending curves of each surface separately. The blending curve is similar to the Keyer luminance blending curve, but you can adjust it per surface.
When you create a matte for the front clip, a matte for the back clip is automatically created to specify which part of the back clip is used for the composite. By default, the back matte is the inverse of the front matte.
You can adjust the luminance of the front matte and back matte separately in the Action blending curve. For example, increase the luminance of the back matte so that more of the back clip shows through at the edges of the key. This creates a better blend at the edges.
The following calculation is applied to each pixel of the image to create the composite. The calculation is applied in three passes, one each for the R, G, and B values of the front and back images, and the pixel is given the resulting R, G, and B values.
Result = F * FrontLUT + B * BackLUT
The Blending Curve menu appears.


(a) Front matte curve (b) Back matte curve (c) Matte box (d) Blend Curves option box (e) Keyframe option box (f) Reset Selection box


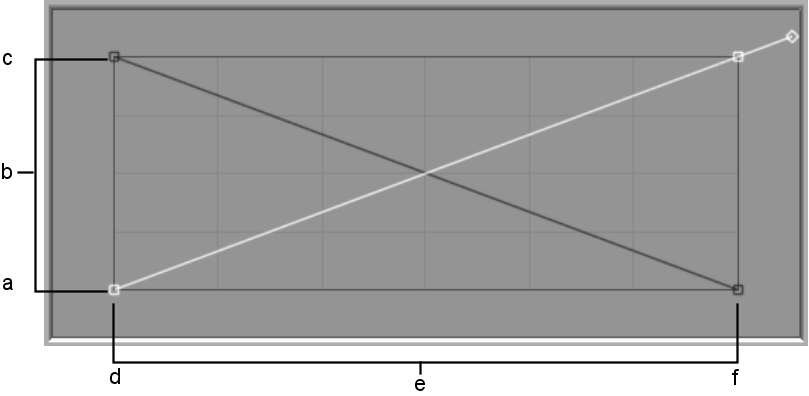
(a) 255 (White) (b) Output (remapping of luminance values) (c) 0 (Black) (d) 0 (Black) (e) Input (current luminance values) (f) 255 (White)
In Move edit mode, click a point to display its tangent handle and drag the handle to adjust the curve. Use other modes in the Edit Mode box (Add, Delete, or Break, for example) to further adjust the curve, adding or deleting points, or breaking tangent handles as needed.