Trim a timewarp using the Timewarp Editor to change its length. This is useful if you change the speed of a timewarp, thereby changing the duration of the clip. You can then trim either the in or out point to include more or less of the timewarped material.
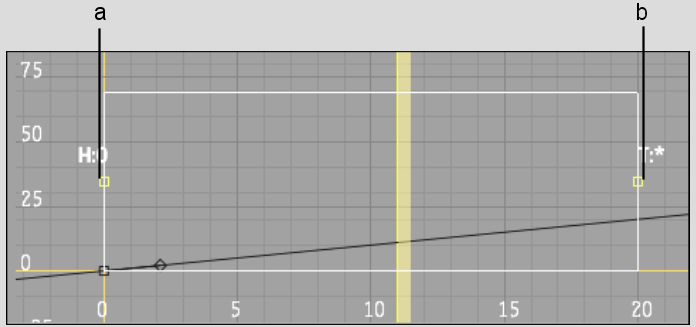
The Trim box, denoted by a white border, represents the in point and the out point of the element being timewarped. The Trim box can be trimmed to change the length of a timewarp. Head and tail frames appear outside the box.


(a) Trim box in point (b) Trim box out point
All settings in the Timewarp quick menu and Timewarp Editor are carried over to each other. For example, the on or off state of the Trim button in the Timewarp Editor is linked to the Trim button in its quick menu. Trim must be on in order to trim gesturally in either the Timewarp Editor or Timeline view.
Use the lock options to determine the effect of trimming.
| Select: | To: |
|---|---|
| Lock Off | Trim the in point or out point of the timewarp without locking any frames in position. The Timewarp Channel curve is unaffected. |
| Lock One | Lock the frame on the current in point or out point when trimming a timewarp. |
| Lock Both | Lock the frames on both transitions when trimming the in point or out point of the timewarp. This is useful for changing the speed and duration of a timewarp while respecting the in point and out point. |
The following illustrations show the effect of trimming a timewarp record out point when the curve is locked and unlocked. The first illustration shows the timewarp clip before trimming.


The next illustration shows what happens to the timewarp when trimming the record out point with Lock Off selected.


The last illustration shows the effect to the timewarp when trimming the record out point with Lock One selected.


The Timewarp Editor provides two methods of trimming a timewarp (in both cases you must enable Trim mode):