Show in Contents

Add to Favorites

Home: Smoke

Render-only Nodes

Batch: Node Reference

Restricting Blur

RGB Blur Node
Use
the RGB Blur node to apply a blur filter to a clip. You can animate
a blur using the Channel Editor. This node accepts a front clip
and a matte clip, and outputs a result and output matte clip. The output
matte clip can have a different level of blur than the result clip.
Apply the Regen button to update the image as
you change blur settings.
This node supports floating-point (OpenEXR)
clip input.
To
blur a colour image:
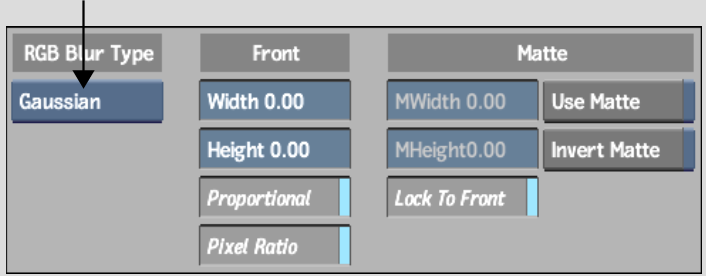
- In
the RGB Blur Type box, select Gaussian or Box.
- If
you want the image to be equally blurred horizontally and vertically,
enable Proportional or hold down the Alt key
as you change a value. If Pixel Ratio is enabled, the image is blurred
using the same proportion as its aspect ratio.
- If
you want to use pixels that are proportional to image aspect ratio,
enable Pixel Ratio.
- If
you want to set the same values for the result and the output matte
simultaneously, enable Lock.
- Set
the width and height of the blur. Increasing the blur increases
the processing time.
- If
you want to set the width and height of the blur for the matte in
the MHeight and MWidth fields, respectively, disable Lock and set
the values.
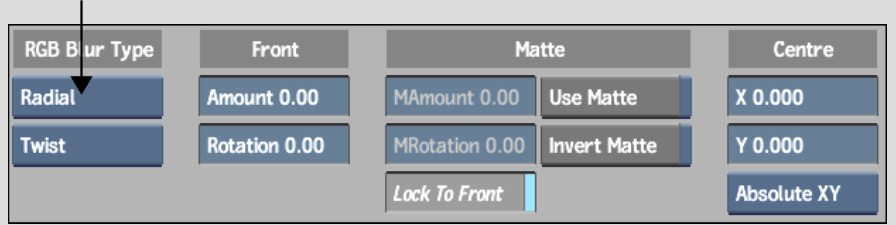
To
create a radial blur:
- In
the RGB Blur Type box, select Radial.
- In
the Radial Blur Type box, select Spin to blur pixels in a single direction,
or Twist to blur pixels in two directions.
- If
you want to set the same values for the result and the output matte
simultaneously, enable Lock.
- Set
the amount of the blur and the angle of rotation. Increasing the
blur increases the processing time.
- If
you want to set the amount of the blur and the angle of rotation
for the matte in the MAmount and MAngle fields, respectively, disable
Lock and set the values.
- Move
the red circle on the image to set the centre of the blur. The position
corresponds to the X and Y values in the Centre fields.
To
create a directional blur:
- In
the RGB Blur Type box, select Directional.
- If
you want to set the same values for the result and the output matte
simultaneously, enable Lock.
- Set
the radius amount and angle of the blur (at a default angle of zero,
the blur is horizontal). Increasing the blur increases the processing time.
- If
you want to set the radius amount and the angle of blur for the
matte in the MAmount and MAngle fields, respectively, disable Lock and
set the values.