Show in Contents

Add to Favorites

Home: Lustre

Setting Logarithmic or Linear Mode

Working With Grades

Autosave Grades and Cuts

Creating a Grade for a
Cut
Save the grade for the
cut you are working on to save all your work on the cut. You can
save up to 100 grades per cut. Grades are named using sequential
numbers, but you can optionally add a text name to the number.
NoteYou can also apply
a grade to a different cut that contains some or all of the same
shots. The grade will be applied to the common shots in the new
cut. See
Changing a Cut.
To create a grade for a cut:
- Create or load a cut for which you want
to save a grade. See
Working With Cuts.
- Work on the grade as needed.
- In the Main menu, click Setup, and then
click Grade.
The Grade menu appears.
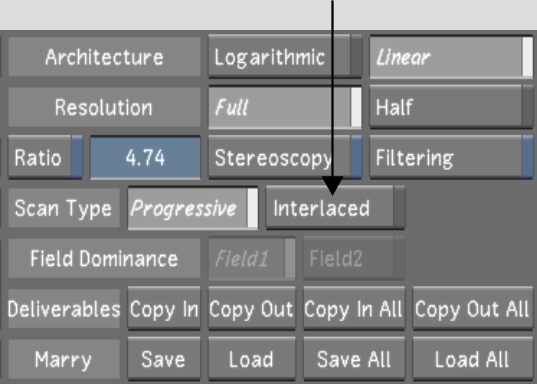
- Indicate the scan type. For film-based
projects, enable Progressive. For video-based projects, enable Interlaced.
NoteInterlaced support availability depends
on the version of the graphics card installed on your system. See
your release notes for details.
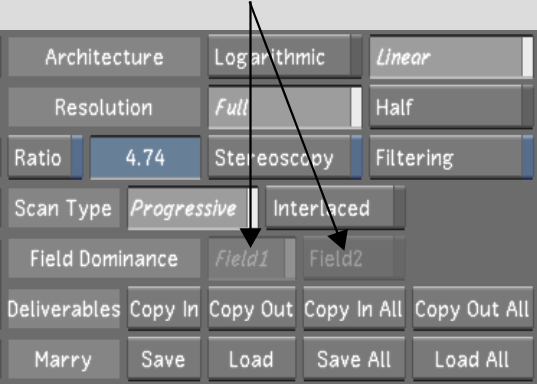
- If working in Interlaced mode, select
the dominant field by enabling either Field 1 or Field 2.
The dominant field is rendered first, and is
the first field to which animations are applied. By correctly setting
the dominant field, you can avoid introducing noticeable jitter
that would result if the field recorded earlier in time is displayed
after the field that was recorded later in time.
NoteField-based projects
display a half-pixel downshift on the image's second field when
viewed on the data monitor.
- (Optional) Type a name for the grade
in the Grade field and press Enter.
- Click Save or press S.
The grade appears in the Grade list under the
current scene. It is given a sequential number. If you gave it a
name, that name appears in addition to the number. The name of the
associated cut appears in brackets to the right of the grade name.
To save a new version of a grade:
- In the Grade menu, click New Version.
The current settings are saved to a new grade
version, which appears in the list. The new grade is named with
a number one above the highest existing number.