Chapter 17, Animation
| Copying and Pasting Keyframes | Animating in Other Menus | ||
Chapter 17, Animation |
|||
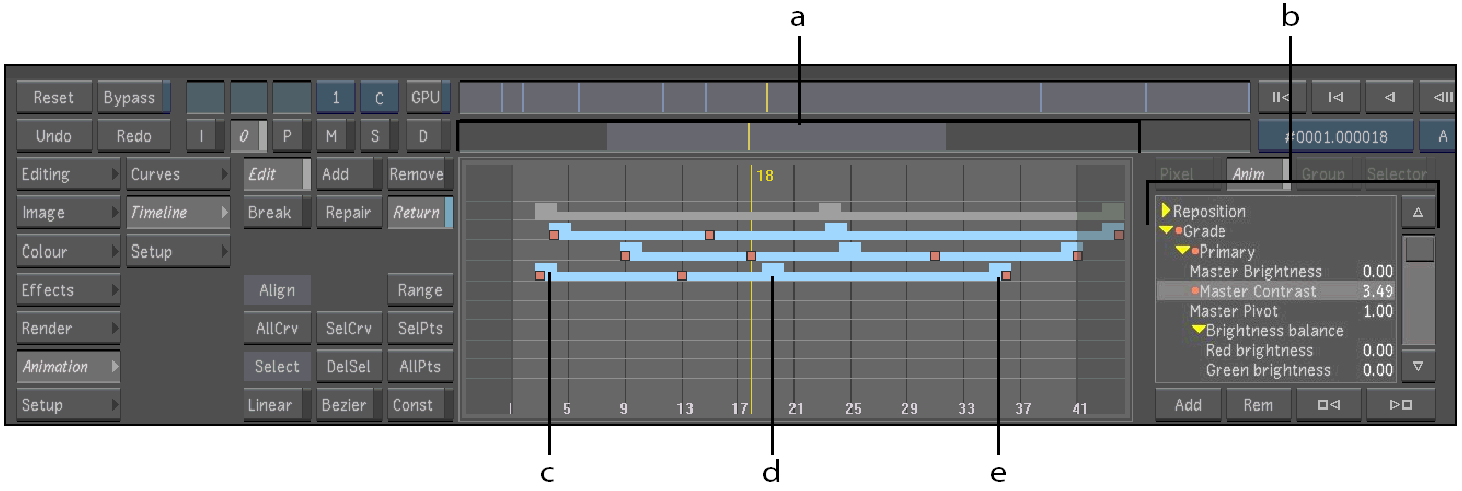
Use the Track Editor to adjust animation timing after you create an animation. With the Track Editor, you can select and view all the keyframes and channels in your animation, but you do not see the animation curves. Instead, you see a track representation of each animation curve. Using the handles on the track, you can move the keyframes in time, but you cannot modify their value. This makes it easier to change animation timing to match on-screen occurrences.
In the Track Editor, channels are represented by horizontal bars called tracks. The channel name appears in the Channel Hierarchy to the right of the Track Editor.
 "Show full-size image")
|
|
|
|
|
The position and length of a track is determined by the first and last keyframes of the channel it represents. The track extends from the frame number of the first keyframe to the frame number of the last keyframe.
Light blue tracks represent selected channels. Dark blue tracks are for deselected channels. Grey tracks represent directories that contain at least one animatable channel.
Superimposed over each track are small orange squares that represent the position of the channel's existing keyframes. You can adjust the position of these keyframes without affecting their channel value.

Use the Track Editor to adjust animation timing for an existing animation.
Click Animation, and then click Timeline.
The Track Editor appears.

 "Show full-size image")
Before you can adjust an animation's timing, you must select the channel in the Channel Hierarchy.
Click Animation, and then click Timeline.
In the Channel Hierarchy, either select a folder (to select all channels), or expand a folder and select individual channels.
Selected channels are light blue. Deselected channels are dark blue.
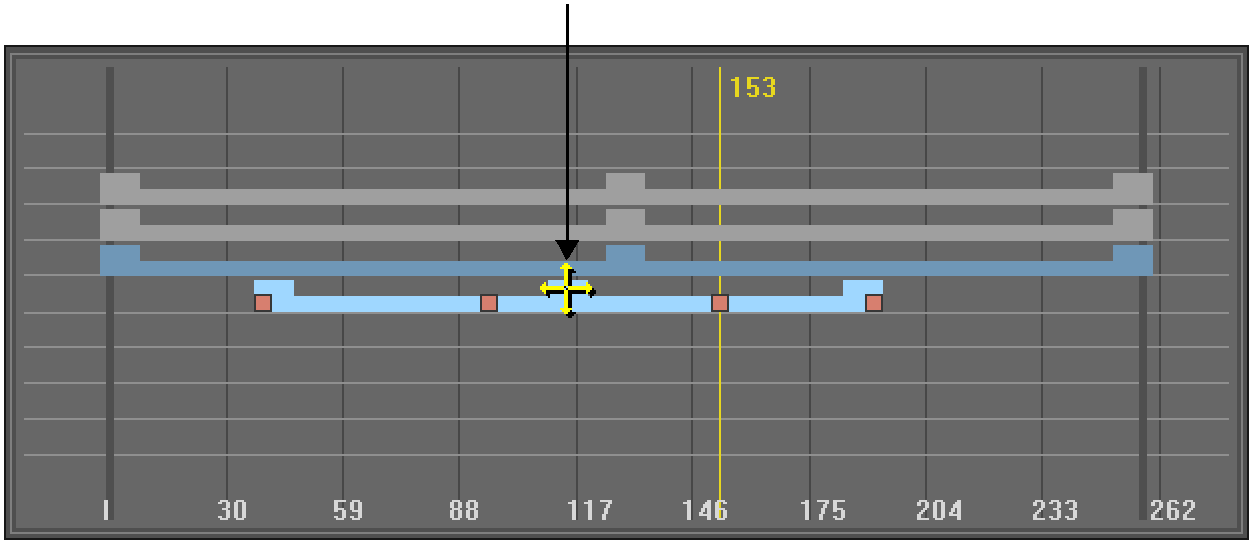
Using the Track Editor, you can adjust a keyframe's timing without adjusting its value. You can also slide the entire animation ahead or back in time, and change the duration of an animation.
Click Animation, and then click Timeline.
Hint: Click Range to see all three handles.
In the Channel Hierarchy, select the channel you want to modify.
The corresponding track in the Track Editor turns light blue and its keyframes appear.
Move the mouse over the centre light-blue handle. When the four-direction arrow cursor appears, drag to the left or right to slide the entire animation forward or backward in time.
 "Show full-size image")
Note: Adjusting timing for a folder changes the timing for all channels in that folder.
Click Animation, and then click Timeline.
In the Channel Hierarchy, select the channel you want to modify.
The corresponding track in the Track Editor turns light blue and its keyframes appear.
Drag the keyframe to the left or right to slide the keyframe forward or backward in time.
Note: Dragging a keyframe in the Track Editor does not change the channel value.
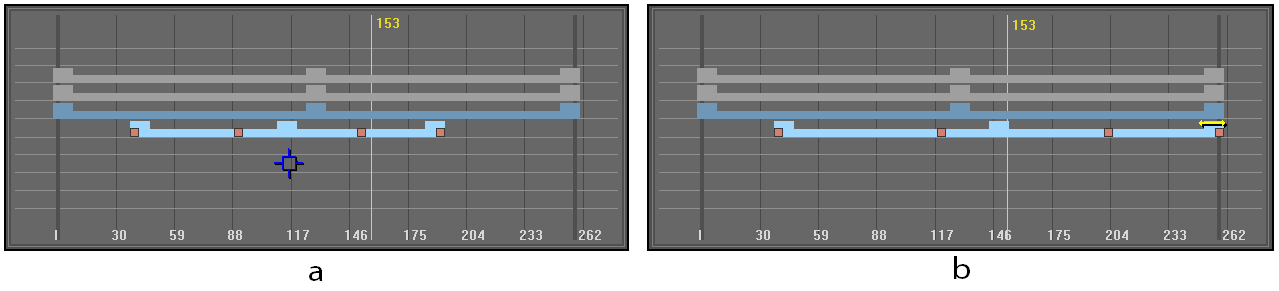
Using the Track Editor, you can independently modify the animation's start or end point. This changes the animation's overall duration and scales the keyframes. Dragging the start or end point compresses or stretches the keyframes in the selected channels. If you want to simply move the first or last keyframe to another point in time, drag the keyframe.
 "Show full-size image")
|
|
Note: By repositioning the start or end point, you cannot delete any existing keyframes. This means that you can only adjust the start or end time as far as the adjacent keyframe.
Click Animation, and then click Timeline.
In the Channel Hierarchy, select the channel you want to modify.
The corresponding track in the Track Editor turns light blue and its keyframes appear.
Select the first or last keyframe and drag it to change the start or end point of the animation.
Note: Adjusting the timing for a folder changes the timing for all channels in that folder.
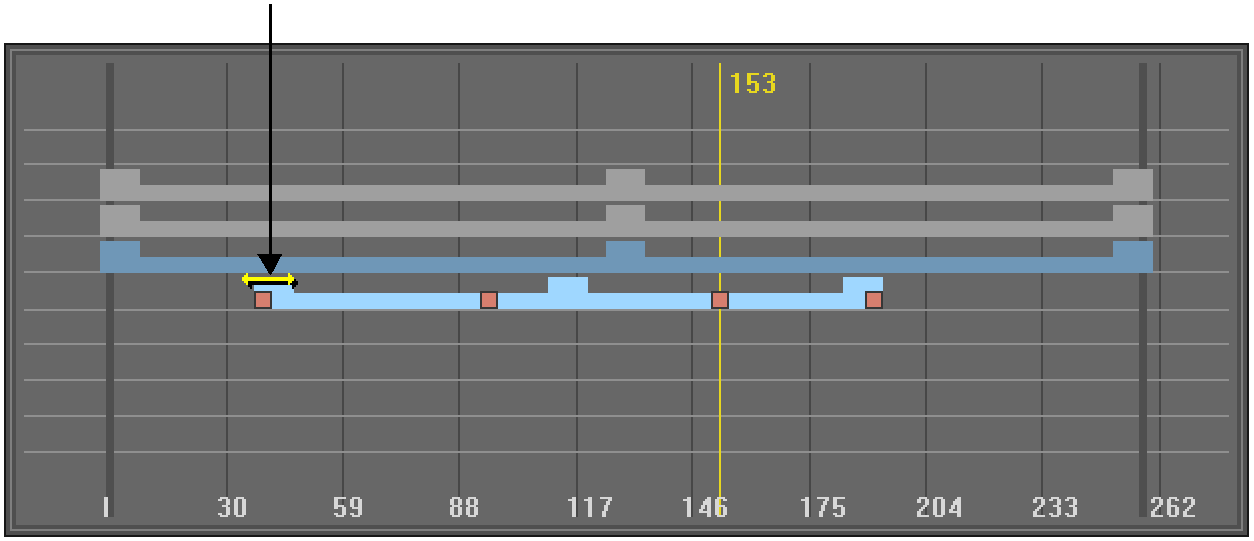
Click Animation, and then click Timeline.
The Track Editor appears.
In the Channel Hierarchy, select the channel you want to modify.
The corresponding track in the Track Editor turns light blue and its keyframes appear.
Move the mouse over the starting light-blue handle. When a two-directional arrow cursor appears, drag to the left or right to slide the start point forward or backward in time.
 "Show full-size image")
As you drag the handle, the keyframes in the track scale proportionally to the amount you move the handle.
Note: Adjusting the timing for a folder changes the timing for all channels in that folder.
