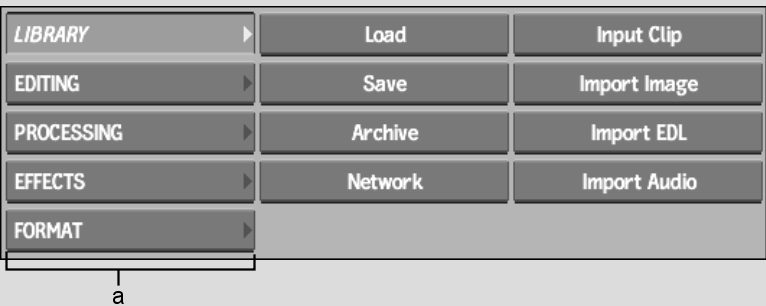
The desktop appears on start-up, and it is your top-level work environment in each session. Once you start the application and select a project and user with which you want to work, the application initialises. When initialisation is complete, the message “Startup complete” appears in the message bar. Tap the pen, click the mouse, or press Enter. Five buttons comprising the Main menu appear in the lower-left corner of the screen. This is the desktop.


(a) Main menu
The Main menu buttons are described as follows.
Library (or press 1)Opens the Library menu. The Library menu provides management and archiving functions for clips and image files. You can use the network library to access clip libraries in other projects on the local system or from remote systems. You can also transfer clips to and from an external recording device (such as VTRs) or the filesystem.
Editing (or press 2)Opens the Editing menu. The Editing menu provides commands for editing and assembling clips. You can cut, splice, reverse, and copy clips. You can also perform mixes, dissolves, crossfades, change the timing of a clip, and access the EDL menu for importing EDLs.
Processing (or press 3)Opens the Processing menu. The Processing menu provides image processing commands that are applied to frames in a clip. You can also change the colours of a clip and perform colour corrections.
Effects (or press 4)Opens the Effects menu. The Effects menu contains modules for compositing and adding special effects to clips.
Format (or press 5)Opens the Format menu. The Format menu contains video and film setup commands. There are commands for changing the field dominance and for interlacing, deinterlacing, and merging the fields in a clip.


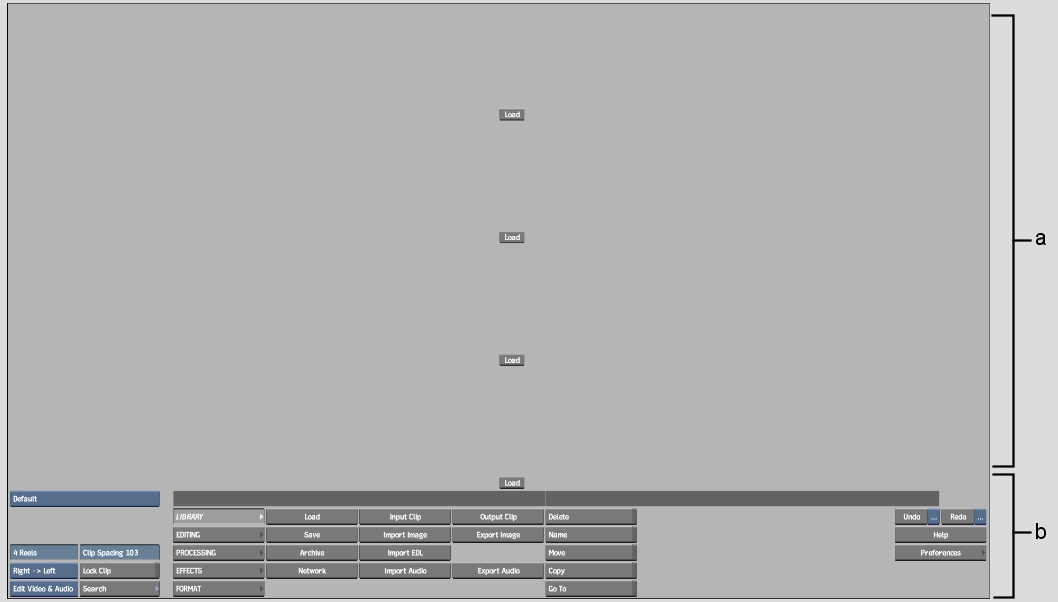
(a) Desktop reels (b) Menu
The menu contains Reel display options, controls for the currently selected menu, Undo/Redo buttons (and lists for multiple undo), and the Help and Preferences buttons.
The desktop contains reels to which you capture, create, and load reels. If you are starting a new project, the reels are empty.