Show in Contents

Add to Favorites

Home: Inferno

Adding Tracks

Track Basics

Changing the Current Track

Activating a Track's Output
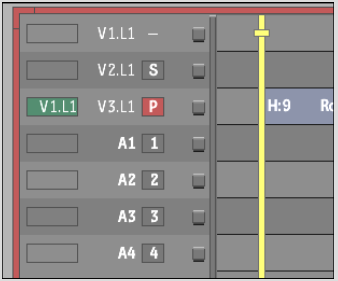
Although
you can add as many audio and video tracks as you want, only 1 video
track can have an active output channel, and up to 32 audio tracks
can be mapped to input strips on the AudioDesk.
To
activate a track's output:
- Click
the respective track's output indicator.
The inactive symbol (--) changes as follows:
- If
you activated a video output channel, a “P” appears
indicating it is the Primary video track. The previously active
video output channel is deactivated.
- If
you activated an audio track's output indicator, a number between
1 and 32 appears. You can assign an audio track to any of the 32
input strips on the AudioDesk by clicking the indicator and dragging
left or right.