Animation is based on a principle of human vision. If you view a series of related still images in quick succession, you perceive them as continuous motion. Each individual image is referred to as a frame. In Flint, animation refers to a value that changes over time. A value can be anything from the position, rotation, scaling, or transparency of an object, to the gamma, gain, or offset in a colour correction.
A common animation technique uses changes in position and orientation of objects on successive frames to create the illusion of movement. For example, in Action, you can set the position of objects, light sources, and cameras for an animated result.
There are several approaches to creating animations. To animate speed and position independently, use motion path animation. To animate object properties such as transparency and scaling, or material properties such as colour, blending, and textures, set keyframes automatically or manually. Most properties in Flint can be animated.
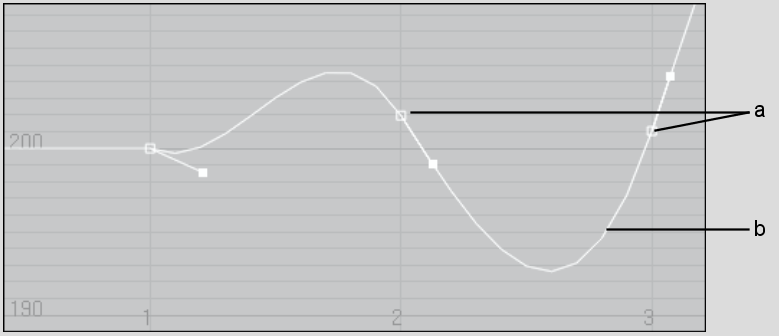
Values used to create animations are called channels. You set channel values in the Channel Editor. To create an animation, you set a different value for the same channel at two or more frames. After you set a value for a channel at a particular frame, the value at that frame is called a keyframe.


(a) Keyframes (b) Animation curve
Each keyframe has two components: a value for the channel and the frame where the value is set. Keyframes are plotted on an animation curve in the Channel Editor. This curve maps frame numbers on the horizontal axis and channel values on the vertical axis. When you set more than one keyframe, the values between the keyframes are automatically calculated, creating the animation curve.