Show in Contents

Add to Favorites

Home: Flint

About the Burn In Menu

Timecode and Keycode

Importing Final Cut Pro XML

Burning-in Clip Information
Use the Burn In tools to burn-in clip information
such as timecode and
frame numbers. The information appears as text on your clip for
your reference.
If you are mixing clips that originate from
formats that use different timecode, you may want to burn-in information
on a clip to keep a timecode reference clip.
NoteBurn In settings are saved from session
to session. You can reset them to the factory defaults by clicking
Reset.
To
burn-in clip information from the Burn In menu:
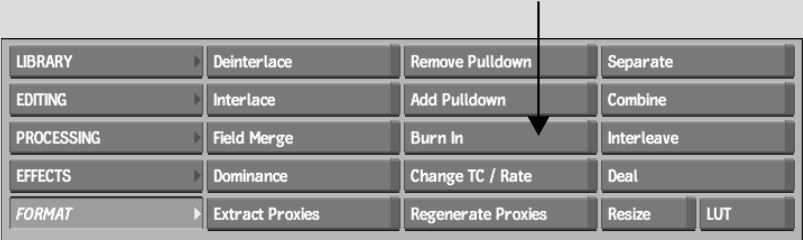
- In the Main menu, click
Format.
- In the Format menu, click
Burn In.
- Enable
the buttons for the clip information that you want to burn into
the clip, such as Comments, Source Timecode and
Date/Time.
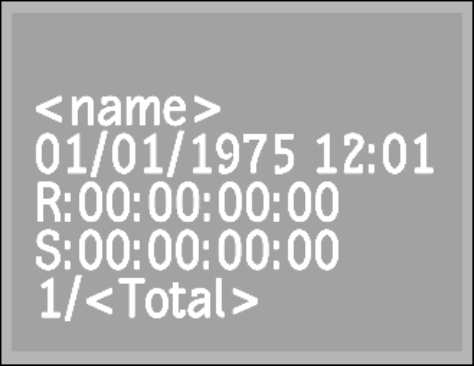
The selected information on the clip is shown
in the sample frame. See
About the Burn In Menu.
- Click
to edit any of the timecode fields.
- Click
Burn In.
- Select
the clip into which you want to burn in the clip information.
- Select
the destination for the result clip.
The result clip appears in the selected destination.
To
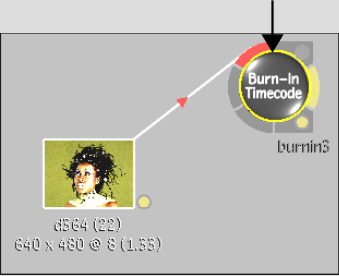
burn-in clip information from the Burn-In Timecode node in Batch:
- Add
a Burn-In Timecode node to the schematic.
- Select
the Burn-In Timecode node to display its menu.
- Enable
the buttons for the clip information that you want to burn into
the clip, such as Comments, Source Timecode and Date/Time.
- Click
to edit any of the timecode fields.
- Continue
working on your clip in Batch.