Creating Glow Effects Using Optics


Use Optics to add glow effects around front clips composited over back clips. The shape of the glow is determined by the matte you select when entering Optics.

To add a glow effect to a clip:

  1. In the Main menu, click Effects.
  2. In the Effects menu, click Optics.
  3. Select the front, back, and matte clips, and a destination.

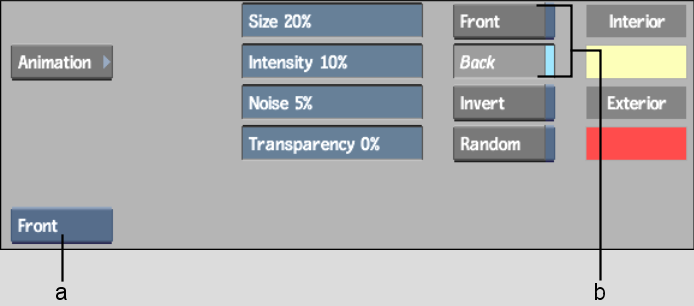
    The Optics menu appears. By default, Front view is enabled to speed up processing.

    Show small imageShow large image

    (a) View box  (b) Optics Front and Back buttons  

  4. From the View box, select Result to view the glow effect.
  5. Use the Optics Front and Back buttons to enable or disable the front and back clips. You can also invert the matte by enabling Invert.
  6. If necessary, use the Size and Intensity fields to adjust the size and intensity of the glow effect.
  7. Adjust the noise factor to make the glow jitter in the processed clip.

    If you want to create a second processed clip where the glow jitters in a slightly different way from the first one, enable Random before processing the second clip.

  8. If necessary, use the Transparency field to adjust the transparency of the front clip.
    NoteMake sure you enable the Optics Front button.
  9. Use the colour pots to change the colour of the glow. Click a colour pot to display the colour picker. See Picking Colours.

    The interior and exterior glow colours are blended.

    NoteTo reset the glow, click the Reset All button and Confirm.
  10. Click Process.

    The generated clip appears on the destination reel.