Creating the nParticle sparks is the final stage to the two-part particle effect. The nParticle sparks are emitted from the
nParticle_sparks_emitter object at various locations along the chute using . An external gravity field is added to give the sparks an arcing motion as they fly up and fall to the foundry floor.
You also add two more so that the sparks do not collide with the slag or the nParticle _sparks_emitter objects.
To emit the nParticle sparks
- In the , select the nParticle_sparks_emitter object and select .
- Select >
 .
.
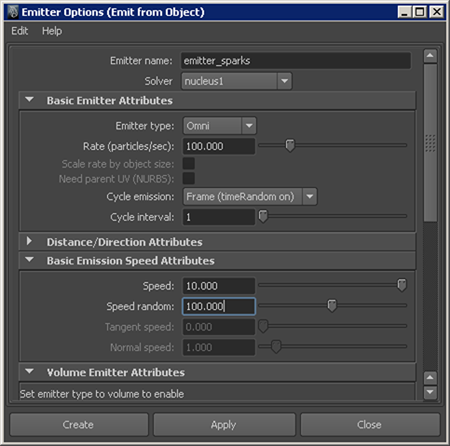
- In the window, select and do the following:
- For the Emitter name, type emitter_sparks.
- If the list appears, ensure that it is set to nucleus1.
- In the section, set the following:
- : 100
- :
When is set to , the emission sequence is restarted after the number of frames specified by . For this effect, is left at 1, so the emitted sparks cycle restarts each frame.
- In the section, set the following:
- Click .
- In the , rename the new nParticle object to nParticle_sparks.
- Rewind and play the simulation.
Notice again that the new nParticle system collides with the slag, breaking the mesh apart. To solve this, you add two more
constraints.
- In the nParticle_slag object's tab in the , turn off .
You can now select the nParticle object for the nConstraint.
- In the , Ctrl-select the nParticle_slag and nParticle_sparks objects, then select .
Name this constraint dynConstraint_slag_sparks.
- Add another constraint between the nParticle_sparks_emitter and nParticle_sparks objects. Name this constraint dynConstraint_sparksEmitter_sparks.
- Rewind and play the simulation.
The particle systems no longer collide, but the nParticle_sparks need adjustments to make them look and behave like red-hot
sparks.