You can modify the skin weights for any of the influencing joints to alter the irregular region. If you don’t get the desired results when you change the skin weights of one of the influencing joints, you can undo your changes and try another influencing joint.
In general, it’s best to modify the skin weights of the most influential joint first, then work with less influential joints if you don’t get the desired results. Modifying skin weights requires experimentation.
In the next steps, you’ll modify the skin weights for the left_arm_root joint.
To modify skin weights using the Paint Skin Weights Tool
As you stroke a region, a red circle icon indicates the area affected by the brush stroke. Each stroke adds 0.1 (10%) to the skin weight. The weight for a skin point has a maximum value of 1 (fully white).
Repeat the strokes several times until the irregular region becomes smoother. The jagged, asymmetrical wireframe at the breast becomes more symmetrical as the skin becomes smoother. The region whitens, which indicates increased influence from the left_arm_root joint. Note that increasing the influence of one joint lessens the influence of the other influencing joints.
 in the Maya Toolbox. (You might also prefer to cancel the selection of Jackie to eliminate the display of the highlighted
wireframe.)
in the Maya Toolbox. (You might also prefer to cancel the selection of Jackie to eliminate the display of the highlighted
wireframe.) 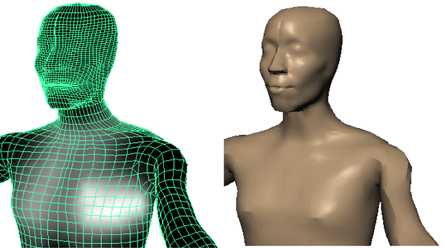
 in the Maya Toolbox.
There are several additional tool settings you might find useful as you modify skin weights:
 lets you select vertices in a region with undesirable deformation then click to quickly flatten the area. This tool checks
the weight values of neighboring vertices and applies the same weight value to the selected vertices.
lets you select vertices in a region with undesirable deformation then click to quickly flatten the area. This tool checks
the weight values of neighboring vertices and applies the same weight value to the selected vertices.
It is common for a surface to look good in one pose but not in another. Strive to make the surface look good in the poses that you are likely to use during animation.


