


To create a simple cap for the salt shaker, you’ll create a sphere, alter its shape, and position it above the body.
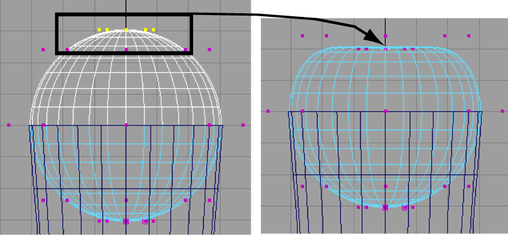
To create and modify a sphere for the salt shaker’s cap
 . In the options window, select Edit > Reset Settings, and click the Create button. Maya puts the sphere at the origin, its display currently obstructed by the salt shaker body.
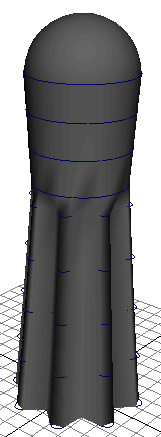
Check that the bottom half of the cap isn’t poking through the visible surface of the body. You can scale the bottom CVs inward to avoid this problem.