Depending on the mapping you start with, you may sometimes find that your UV mesh is broken up in ways that can ruin your final result. In these cases, you can manually sew UV edges back together.
To map the head to the UV space

 -click the head and select Assign Existing Material > checker_pattern.
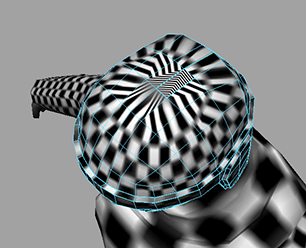
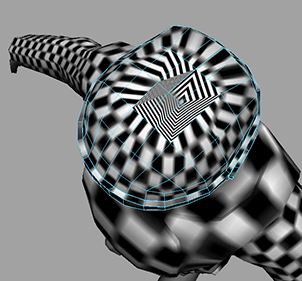
Notice that because you started with a cylindrical mapping, the checker pattern on the sides of the head aren’t warped like in the previous examples. Unfortunately, if you tumble the camera you can see that the top of the head is now warped. In this particular case this is preferable and you will see the reason why later.
If you turn on texture border display by clicking the Texture Border Display icon ( )in the UV Texture Editor, and re-examine the top of the helmet, you can see that a few edges that are not on the line of symmetry are colored thick
blue. This indicates that they are on the border of the UV mesh and will cause a seam. You can fix this by sewing these overlapping
UV edges together.
)in the UV Texture Editor, and re-examine the top of the helmet, you can see that a few edges that are not on the line of symmetry are colored thick
blue. This indicates that they are on the border of the UV mesh and will cause a seam. You can fix this by sewing these overlapping
UV edges together.
-click the helmet and select Edge from the marking menu.
 -select the two thick blue edges at the top of the helmet that are not on the line of symmetry.
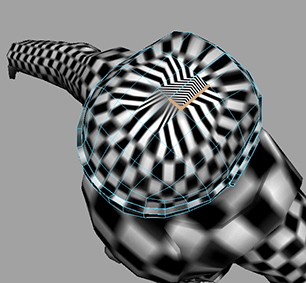
Notice that after sewing the UV edges together, the distortion has actually gotten worse. However, this is only temporary and is fixed when you perform the unfold.
To unfold the helmet’s UV mesh
-click the face mesh and select UV from the marking menu.

 .
.
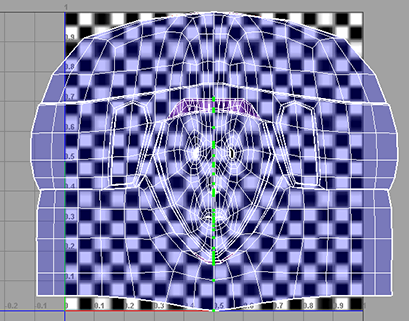
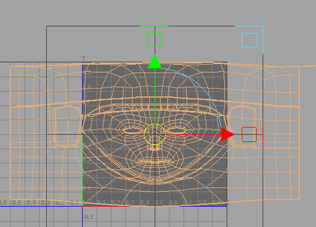
The face unfolds evenly across the texture space.