If you discover areas of the model's scalp where there are too few hair curves, you can use the Paint Follicles tool to add more follicles to the hair system. One method of increasing hair density is to add passive hair curves by painting passive follicles. Passive hair curves generate movement by interpolating the behavior of neighboring dynamic curves. Since the Nucleus solver does not need to calculate dynamics for passive curves, they are useful for increasing the curve density of a hair system without affecting the performance of the hair simulation.
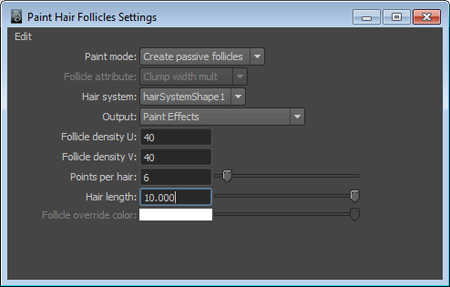
In this section of the lesson, you use the Paint Hair Follicles tool to add passive follicles to selected areas of the model's scalp.
 .
.
Follicle density specifies the number of follicles created in the U and V direction for the selected face.
This ensures the passive curve length matches the existing dynamic curve length.

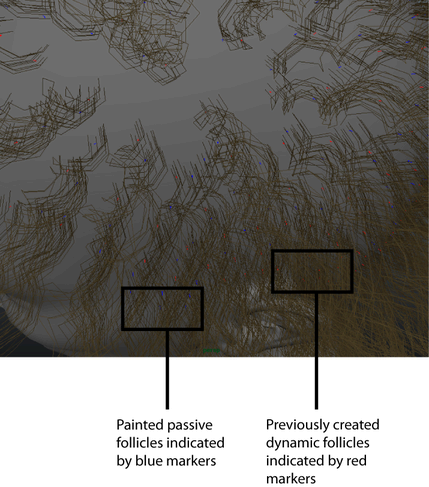
As you paint the model surface, the placements of passive follicles are indicated by the blue markers.

To further add density to your hair style, you can further increase the Clump Width.
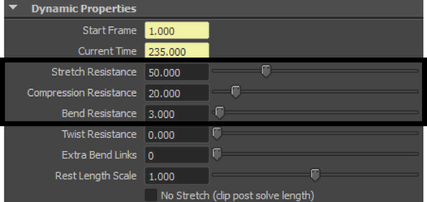
Notice that when you play the hair simulation, the hair appears limp and flat. You can add body to the hair style by setting the Stretch Resistance, Compression Resistance, and Bend Resistance attributes.
To add stiffness and body to the hair

The hair style has more body and bounce. To add more stability and stiffness to the hair style, you can apply what it known as a "hairspray" effect. You do this by setting the Start Curve Attract attribute, which specifies the amount dynamic curves maintain the shape and position of the curve Start Position.
| Marker | Selected Position | Selected Value |
|---|---|---|
| 1 | 0 | 0.160 |
| 2 | 0.25 | 0.5 |
| 3 | 0.75 | 0.5 |
| 4 | 1.0 | 0.16 |
Notice that the attraction force overpowers gravity and causes the hair to be too stiff and wire-like. To solve this, in the next section of the lesson you change how Nucleus Gravity affects the hair simulation by setting the Space Scale attribute.