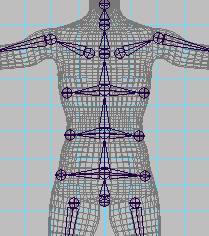
When you bind a character to a skeleton (described in the next lesson), the skeleton provides a structure for the character’s skin and prevents the skin from collapsing as you pose the skeleton.
It’s useful to add extra joints in areas of the character where you want the surface to keep its volume upon deformation. In the next steps, you’ll add ribs to Jackie’s skeleton. Although you will not bind the character in this lesson, the technique of adding ribs is important to learn so that when you do bind a character, the skin in the torso area will not collapse as you pose shoulder and spinal rotations. The rib joints are for structure only, not for posing the skeleton.


 Except where otherwise noted, this work is licensed under a Creative Commons Attribution-NonCommercial-ShareAlike 3.0 Unported License