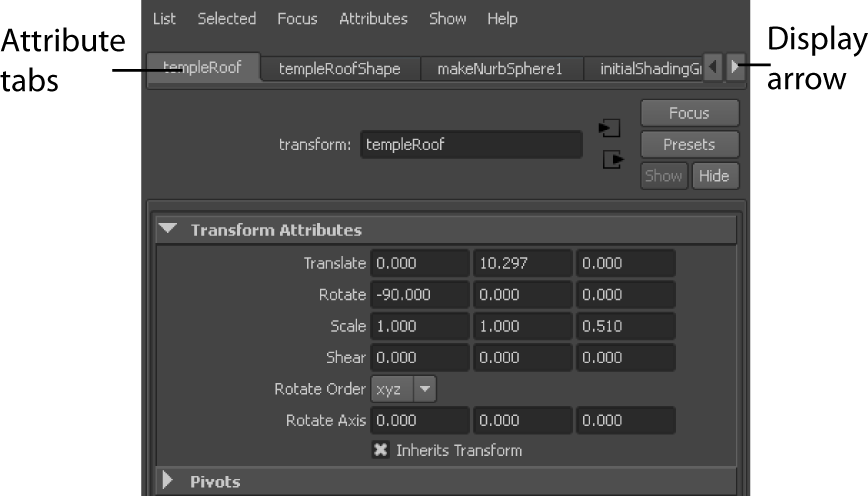
The Attribute Editor provides information about the various nodes and attributes for the objects and materials in your scene. Like the Channel Box, you can view and edit the basic transform information and many other keyable attributes. However, the Attribute Editor provides a more detailed display of all attributes for a selected object.
To view object attributes using the Attribute Editor
The Attribute Editor displays the attributes for templeRoof. The various attributes for the templeRoof object appear under various tabs. Each tab represents a node.

This tab is known as the transform node, because the most important attributes on this tab control templeRoof’s transformation. Every visible object in Maya has a transform node, including cameras and lights.
This tab is called the shape node because the attributes establish the object’s geometric shape or physical properties when the object is first created. Most objects have shape nodes, some do not, such as the group for the column objects. The shape node also includes other types of attributes, such as object display attributes.
This is an input node that includes attributes related to the object’s construction history. The attributes of an input node are passed to another node subsequent in the construction history for the object—in this case, to the templeRoofShape node.
The initialShadingGroup and lambert1 nodes are default nodes that relate to the default shading material for an object. Maya uses them to establish the initial color of objects and other settings related to shading. If you create your own shading materials for the temple, as you will in the following steps, these nodes are replaced by the new shading nodes you create.
 Except where otherwise noted, this work is licensed under a Creative Commons Attribution-NonCommercial-ShareAlike 3.0 Unported License