Motion Capture is the ability to track in 3D the motion of a non-rigid object, like a human body or face or a piece of cloth. This is a special case compared to rigid moving objects or standard matchmoving, because, for each frame of the footage, the position of any non-rigid track is totally independent from any other previous position, or any other track. Therefore, its 3D position cannot be computed from a single view. To be able to compute the depth of such a track, you must see it through at last two different viewpoints.
So, the basic setup for doing MOCAP (Motion Capture) is to have two synchronized cameras shooting at the same scene, therefore producing two different viewpoints of the same deformable scene.
The MatchMover Motion Capture module is able to cope with any number of synchronized cameras, at different frame rate and resolution each, although it’s easier if all the cameras share at last the frame rate. Cameras can be either fixed or moving. If all cameras moves, the camera motion in respect to the background should be computable through standard matchmoving process using the scene background.
Loading and synchronizing your sequence
The sequence loading process is almost the same as for standard matchmoving. The only difference is that you have to load the two synchronized sequences last. A new “fixed” camera constraint is added to handle fixed camera cases (no rotation, no translation...). You can easily set this constraint directly in the Load Sequence window. Note that each camera device associated with each loaded sequence is assigned a different color:

This color can later be changed in the camera’s Parameters window, and is used to quickly identify which data goes with which camera.
The camera color will be used for:
Synchronization information is displayed in each sequence’s Parameters window under the General settings:

Here is the information that should be provided:
You can configure the
viewports to automatically synchronize their content. Just toggle
the Synchronize Time ![]() icon
for each viewport you want. In this case, when a viewport is synchronized,
it will stay locked on its current sequence, and display the frame
synchronized with the global current frame.
icon
for each viewport you want. In this case, when a viewport is synchronized,
it will stay locked on its current sequence, and display the frame
synchronized with the global current frame.
To change the current sequence of a viewport, select the viewport and set time to a frame of the new sequence. For example, switch to two viewports layout, and toggle Synchronize Time for both. Select the first viewport and jump to a frame in the first sequence, then select the second viewport and jump to a frame in the second sequence. Then when you play, both viewports should be synchronized.
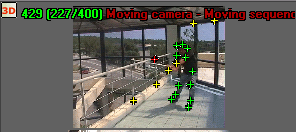
The current camera and sequence information, colored with respect to the camera, is displayed at the top of each viewport next to current time, displayed in green for synchronized viewports so you can easily identify your setup.

When on a synchronized viewport, you can easily switch to the synchronized frame in other sequences using different methods, either using the menu entries (Next/Previous Synchro Frame, default shortcuts PgUp, PgDn), or by right/left clicking on the camera label at the top of the viewport. If the viewport is in 3D free navigation mode, all the synchronized cameras will be displayed, with non-current ones darker.
You can also simply click any camera icon to select it and switch to its corresponding synchronized frame.