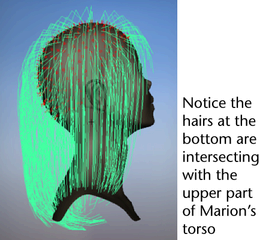
Before trimming Marion’s hair you may have noticed that some hairs intersected her face. As well hairs currently intersect
the lower part of her neck. To fix this you set up hair collisions. You can set hair to collide with itself, other objects
or the ground (grid). In the next steps you use collision constraints to prevent the hair from intersecting with Marion’s
head and neck.
To make Marion’s hair collide with her head and neck
- In the panel, select so you can see collision constraints, which are locators, when you create them.
- To create the collision constraint for Marion’s head, do the following:
- Select .
- Using the , drag around all the hair curves and select .
- Select .
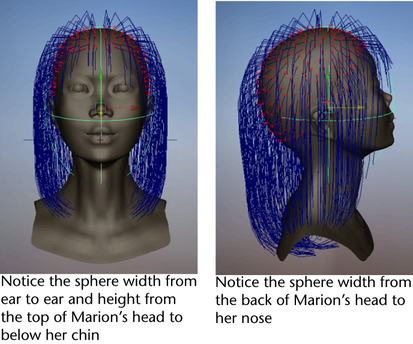
- Using the , resize the sphere so it expands beyond Marion’s head and you can see it.
- Using the , move the sphere up the Y-axis so the top of the sphere is aligned with the top of Marion’s head.
- Using the again, resize the sphere so it matches the basic shape of Marion’s head. First try scaling in the X direction to adjust the
width of the sphere from ear to ear. Then tumble the camera to see the side of Marion’s head and scale in the Z direction
to adjust the sphere width from the back of Marion’s head to her nose. You may also need to move the sphere to tweak its size
and position, as shown in the images below.
- To create the collision constraint for Marion’s upper torso, do the following:
- Using the , drag around the hair curves and select .
- Select .
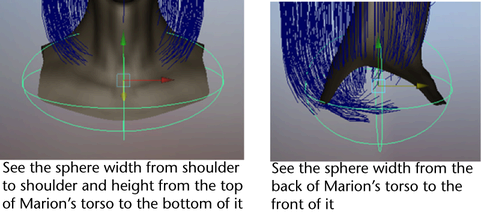
- Using the , resize the sphere so it extends beyond Marion’s neck and you can see it.
- Using the , move the sphere down the Y-axis so the top of the sphere is aligned with the top of Marion’s torso.
- Using the again, resize the sphere so it matches the basic dimensions of Marion’s upper torso. First try scaling in the X direction
to adjust the width of the sphere from shoulder to shoulder. Then tumble the camera to see the side of Marion’s head and scale
in the Z direction to adjust the sphere width from the back of Marion’s torso to the front of it. You may also need to move
the sphere to tweak its size and position, as shown in the images below.
- Select .
- Click the
 button to rewind to the start frame and play the simulation.
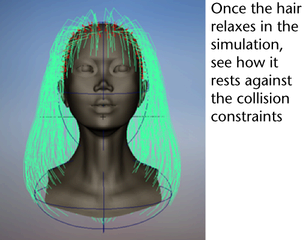
Watch how the hair collides with the collision constraints you created. The hair at the front now rests on the torso and the
hair at the back curls under the torso, instead of intersecting it like it did before the collisions were set.
- Stop the simulation when the hair is relaxed. Should the hair be unruly and not relax, you may need to increase the or the in the section of the hairSystemShape1 tab of the .
- Select the hair, then select so the hair respects the collisions at the start frame of the simulation.
- Select to turn them off, which hides the collision constraints.


 button to rewind to the start frame and play the simulation.
