The Retimer tool lets you generate output footage at a frame rate that is different from that of the input by retiming the image. Two interpolation modes are available to perform the retiming: the Warp interpolation mode, which uses motion estimation to generate intermediate frames, and the Blend interpolation mode, which generates a weighted average of adjacent frames. The Warp mode provides significantly better quality.
Additionally, motion blur (temporal anti-aliasing) can be added so that moving objects appear blurred, as they would when filmed with a real camera, which has a finite shutter speed. You can then modify the timing and/or speed curves through the Animation editor in the UI to create a constant or non-constant time warp.
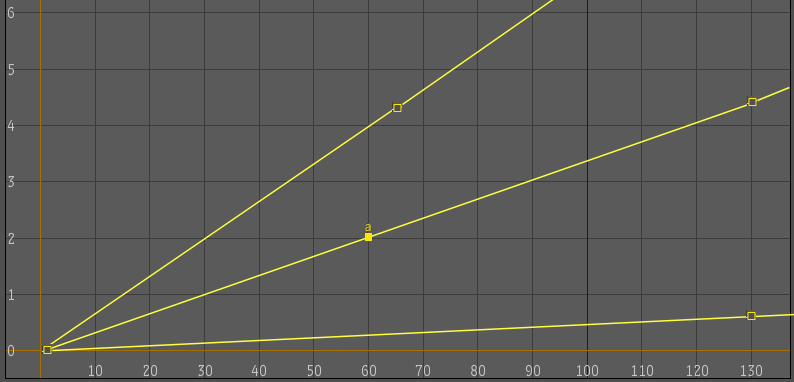
Time warps are created by modifying the timing of the source footage or by changing its playback speed. When you change a clip's timing, you are essentially changing the time that it takes for a clip to reach a given frame. For example, in a 100-frame clip, you can adjust the timing so that only the 50th source frame is reached by the end of the clip's 100 frames. This halves the clip's playback rate. A negative playback rate can be achieved by reversing a clip's timing curve (by changing the value at the last keyframe to the value of the first keyframe and the other way around). In the Timing Animation editor, a steeper timing curve results in a faster playback rate.
Adjusting the clip's speed has different results. Setting the speed to 2.0 doubles the playback rate. A speed value of .5 plays the clip at half speed (or in slow motion). A negative speed value corresponds to playing the clip in reverse (where a -1.0 speed value creates a clip that plays back at the normal rate, but backward).
Speed and time curve editors are identical to animation curve editors and have most of the same controls.

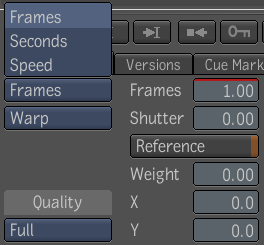
When in Warp interpolation mode, the Retimer has the following parameters:

| Use: | To: |
|---|---|
| Frames | Implement “a frame is a frame” timing. You can control the mapping of output frames to input frames using the Animation Editor. For example, you can add keyframes and have the output frames jump ahead, repeat, run backwards, slow down, or speed up. The Current Frame field will display the input frames and the Frames value editor will display the mapped output frame. |

| Use: | To: |
|---|---|
| Seconds | Control the mapping of output time to input time. When output = input, the clip has normal speed. When output > input, the clip is accelerated. When output < input, yet is increasing, the clip is slowed. When output stays constant, a constant frame is shown. When output decreases, time reverses. |

| Use: | To: |
|---|---|
| Speed | To control the mapping of input time to output time. When speed = 1, the clip has normal speed. When speed > 1, the clip is accelerated. When 0 < speed < 1, the clip is slowed down. When speed = 0, a constant frame is shown (time remains constant). When speed < 0, time is reversed. The speed curve begins with two key frames. Once created, the key frame times are not automatically updated with respect to changes in start and end times. Remember to set clip link Repeat parameter to Loop to avoid indexing black frames. |
| Use: | To: |
|---|---|
| Quality | Control the quality of the internally-generated motion vectors in warp mode by applying the motion analysis only to lower-resolution versions of the input image, up to the resolution specified by the quality parameter. This parameter is disabled as soon as one vector input is connected. Limiting the quality of motion vectors to half or a quarter for a high-resoultion (ex: 1080p or film resolution) input clip can greatly accelerate warp processing, with little loss in resulting retimed output clip quality. |
| Shutter (camera analogy) | Control how long the camera shutter stays open, and therefore the time range over which the samples will be distributed. A value of 1 means a full frame time. Values above 1, though not physically possible, can be specified for artistic effect. |
| Reference | Control when a reference motion vector offset is used. If reference is set, the motion vector at the Reference Position is subtracted from all motion vectors in the image. The result is that the pixel at the reference position will appear to be motionless, and so will pixels with similar motion vectors. Conversely, pixels which were motionless will appear to move with the subtracted Reference Position motion vector. This reference motion vector offset changes over time using the velocity of “neutralized” vectors, so you will seldom have to manually set offset keyframes using Reference Position. |
| Reference Weight | Set the amount of blur to apply at the reference position. A value of zero means that no blur should be applied. This is the default. A value of one means to blur by the same amount as the forward vectors at the Reference Position. This is equivalent to disabling the use of a reference vector offset. A value of one half means to blur half as much as the forward vectors at the Reference Position. |
| Reference X | Describes the x coordinate of the normalized reference position. |
| Reference Y | Describes the y coordinate of the normalized reference position. |
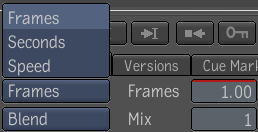
When in Blend interpolation mode, the Retimer has the same frames, seconds and speed controls as in the Warp interpolation mode. In addition, it also has the Mix control:

| Use: | To: |
|---|---|
| Mix | Control the number of next and previous frames to blend. |
 Except where otherwise noted, this work is licensed under a Creative Commons Attribution-NonCommercial-ShareAlike 3.0 Unported License