Load the footage
NoteYou can bypass this section of the lesson by openning
Elastic_Import_Scene.mmf. This file can be found in the
Tutorials/Elastics directory. You can then proceed to
Set up the trackers and the survey points.
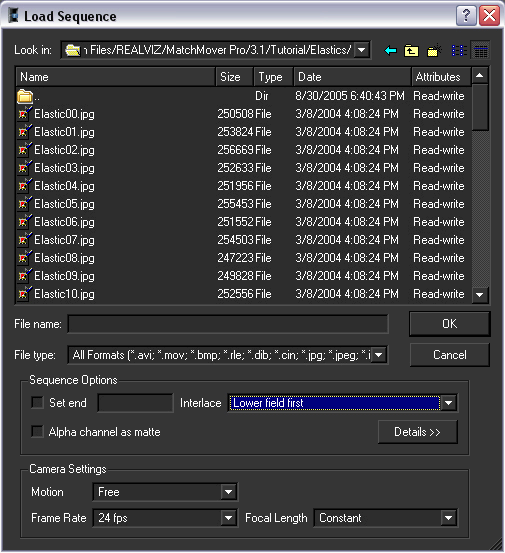
To load the image sequence
- Select or click the Load Sequence
 icon.
icon.
The window appears.
- In the window, browse to the location of the MatchMover Tutorials/Elastics directory, and select Elastic00.jpg, which is the first image in the sequence.
- In the window, under , set type to .
- Under , set to (Frames Per Second).
Leave set to its default setting of .
- Click .
Import the 3D mesh
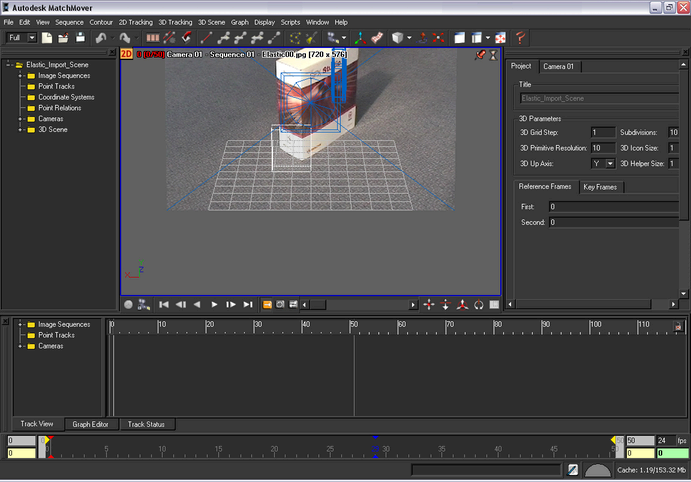
To import the 3D mesh
- Click the 3D space icon
 that is located in the top left of the Workspace.
The view switches to 3D mode. A camera icon and grid is placed in the Workspace.
- Select , or right-click in the Workspace and select from the pop-up menu.
Thewindow appears.
- In the window, select from the list.
- Browse to the location of the Tutorial/Elastics directory, and select Box.obj.
A 3D mesh of the box appears, in wireframe, in front of the image plane. This mesh will now be used as a reference for the
3D tracking. This ensures that the solution will be consistent with this geometry even though this shot holds little parallax.